Open sourcing the Baja Pro

Este artículo también está disponible en Español 🇪🇸
I’ve decided to release the source code and all of the schemes of the project I’ve spent the most time and effort in my entire life. In this post I’ll explain my motivation to do so.
https://github.com/mattogodoy/open-rally-computer
Index
- A bit of history
- Initial prototype
- Version 1
- Version 2
- Version 3
- Version 4
- The web
- The first (and only) batch
- The moment of the sale
- The experience
- Learning
- Releasing the code
- Presenting Open Rally Computer
- Conclusion
Disclaimer : English is not my first language, so I apollogise beforehand for any typos or grammatical errors that you might find in this post.
A bit of history
I am a big fan of motorcycles since I was a little kid. The first thing I did when I got my first job (when I was 18) was to buy a motorcycle.
Since then, I’ve never stopped enjoying the sensations and freedom that only a motorcycle (and maybe a fighter jet) can give you.
It was the year 2015 when I bought my first off-road motorcycle. Until then I have only had road bikes exclusively, and I didn’t know what I was missing.
It was during that same year when I started looking for companion to go on off-road adventures, something that was completely new to me. During that search, I found Motoclub Trail Madrid, a forum where you get to know people interested in these topics. Some of them are great friends of mine up to this day.
It was thanks to these friends that I got hooked up to participating in roadbook navigation rallies. One of the first things that caught my attention was the price of the necessary equipment to participate in these kind of events. It was too expensive, especially for a beginner pilot like myself.
Initial prototype
Electronics is one of many hobbies I have. I have always enjoyed challenges that force me to learn new stuff, so I decided to make my own equipment. I even wrote a post about it in this same blog.
The most important thing that came out of that project was the tripmaster, which was open source since the beginning, so anyone who was interested could build one.
 First prototype of the tripmaster
This initial version used a magnetic sensor that was installed in the front brake caliper. Combined with a magnet glued to the front wheel brake disk, it was capable of detecting every time the wheel made a complete turn. By multiplying the number of turns by the wheel circumference it obtained the traveled distance. By adding time to that equation, it could also calculate speed.
To indicate heading it used a digital magnetometer.
The first prototype worked really well. I even used it to participate in a few rallies. But I wanted to take the project one step further.
Version 1
A new version implied a complete redesign of the tripmaster, leaving behind all that I had done in the previous version.
This change, added to the high demand I was receiving from friends and peer pilots to make some units for them, lead me to think that I could pull off a decent product to sell. So in that very moment I decided not to release the code or the schemes for this new version. From then on it was a private project.
The brand
If I wanted to start a somewhat serious company, I had to think in a brand and model name for the tripmaster.
Inspired by the famous Baja 1000 rally, I decided that the name of my brand would be Baja Rally Computers. My good friend Jaime (Cabras Sobre Ruedas) designed a great logo for me. A logo that I really like up to this day:
 Baja Rally Computers logo
Regarding the model name, it was called Pro , so from now on I’ll be referring to it as the Baja Pro.
Display
The screens I used for the initial prototype were 7-segment displays, just like the ones used by old calculators. These have many limitations, being the first one that they can only display numbers. Also, their use of space is not very efficient.
One of the things that was really hard for me to understand when I learned about roadbook navigation equipment was that the tripmasters made by the most famous and well tested brands (ICO, RNS, etc) only show one thing at the same time: either distance, or speed, or heading, but only one. So they are not only very expensive, but you also have to buy two (generally you’ll need to see distance and heading at all times).
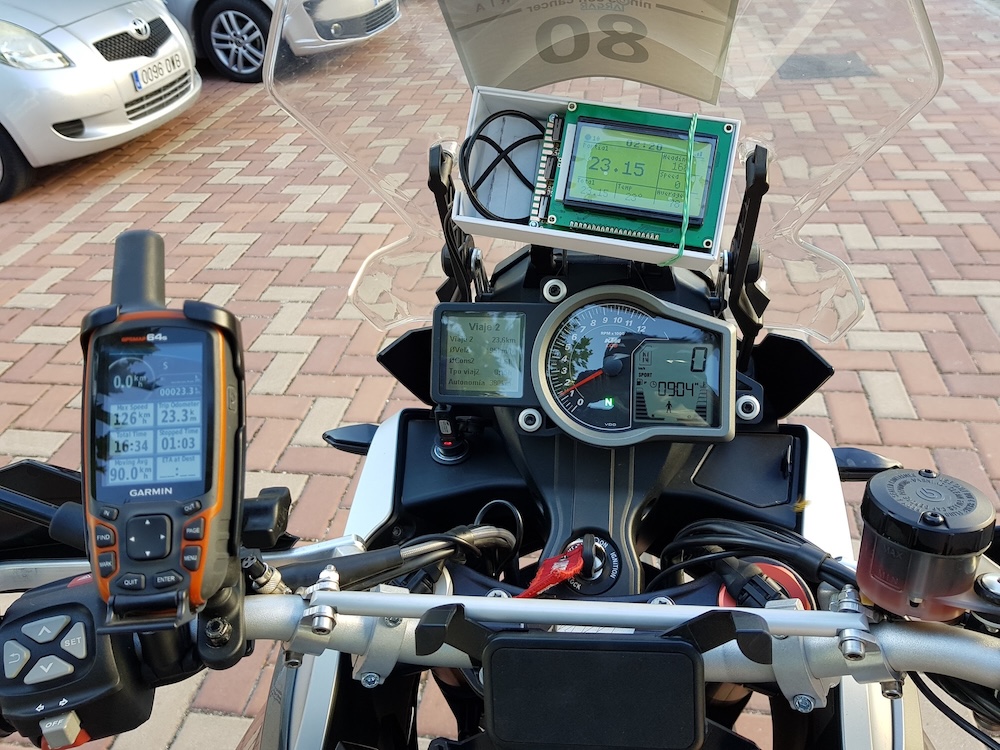
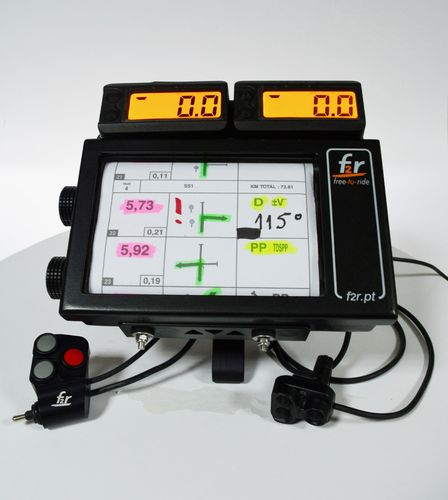 Standard configuration: Two tripmasters and a roadbook holder
For this new version I wanted to use a display that allowed me to show more information, so I could use only one device to see both numbers.
This took me through a deadly spiral of infinite madness in which I spent countless hours researching, comparing and testing a lot of different displays to see which was the one that fitted my needs the best. I might have tested at least 8 different displays (LCD, OLED, e-ink, etc.).
The main requisite was that the information was clearly readable in direct sunlight conditions (which is the normal during a rally). This turned out to be quite complicated because the displays that had the most capabilities and were the easiest to implement, were also the ones that looked the worst under the sun.
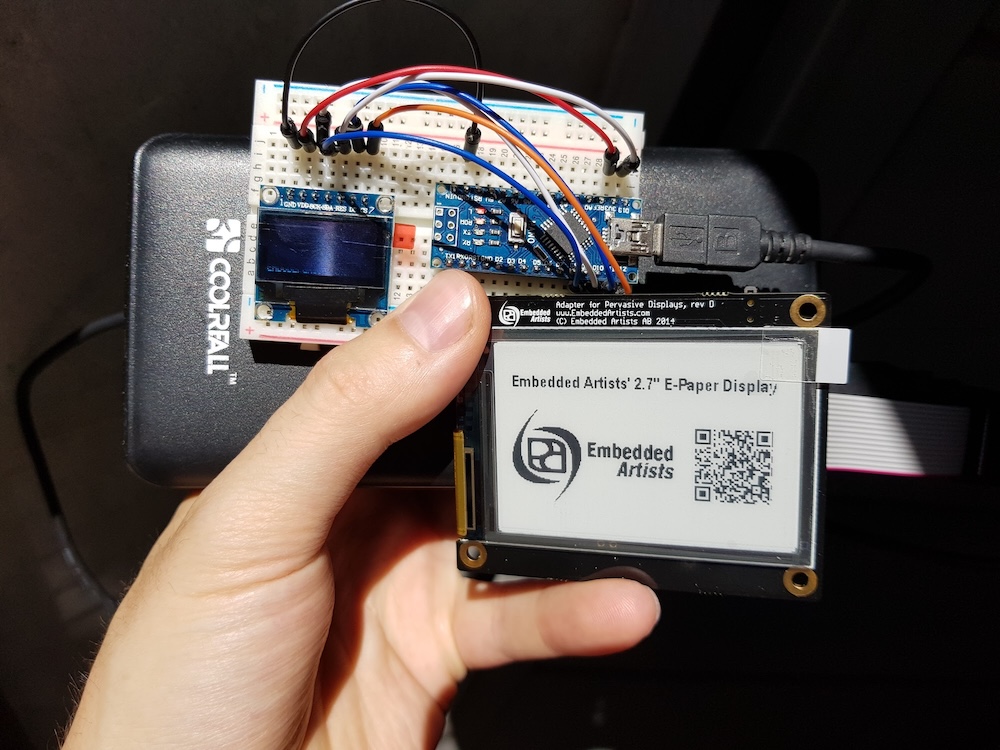 Comparing an OLED display (on the left) with an e-ink display (on the right) under direct sunlight
My preferred option was the e-ink display. It has the advantage that the more sun there is, the best it looks. Just like ink printed in a paper.
 Testing an e-ink display
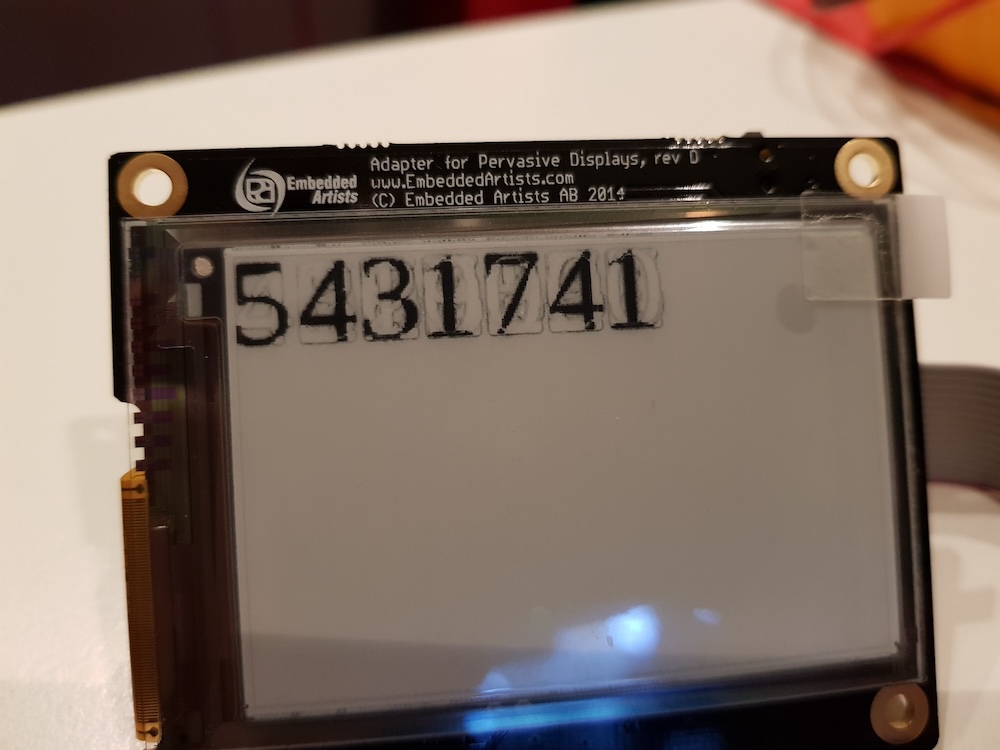
But these displays have a big disadvantage: Their refresh rate is quite low. Every time you want to change something in it you have to go through an erase process to remove the previous data first. Anyone with an e-reader knows what I’m describing here. If we wanted to skip the erase process altogether and simply show the new information, some artifacts start showing up. This is known as “ghosting” and you can clearly see it in the previous image.
Another disadvantage is that the price for these displays is around 10 times higher than their counterparts.
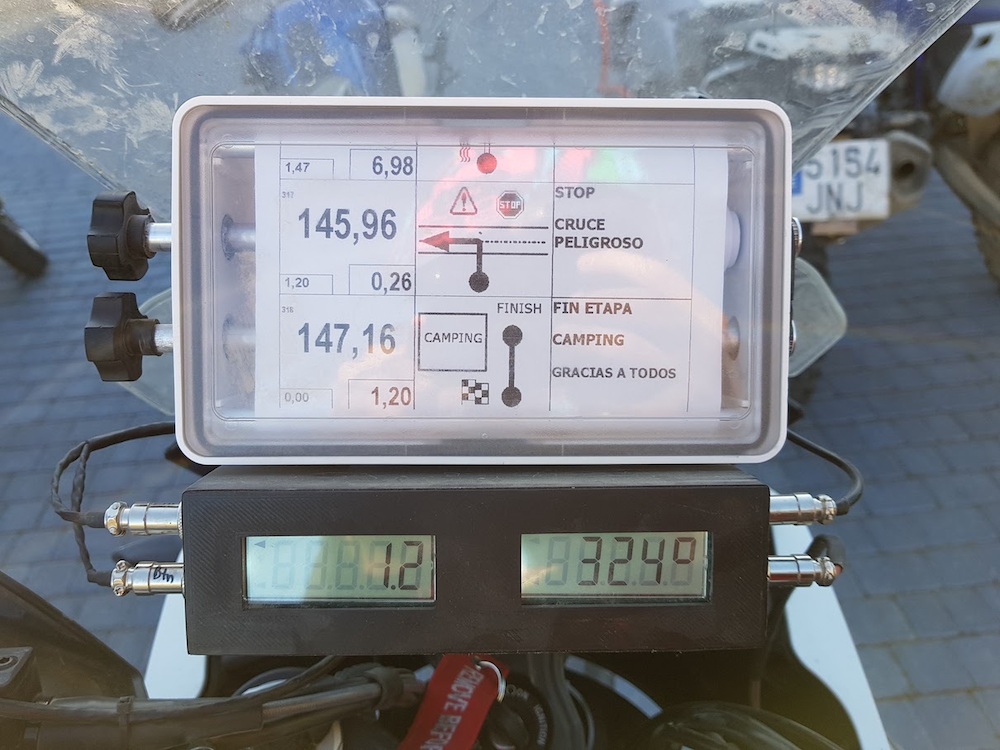
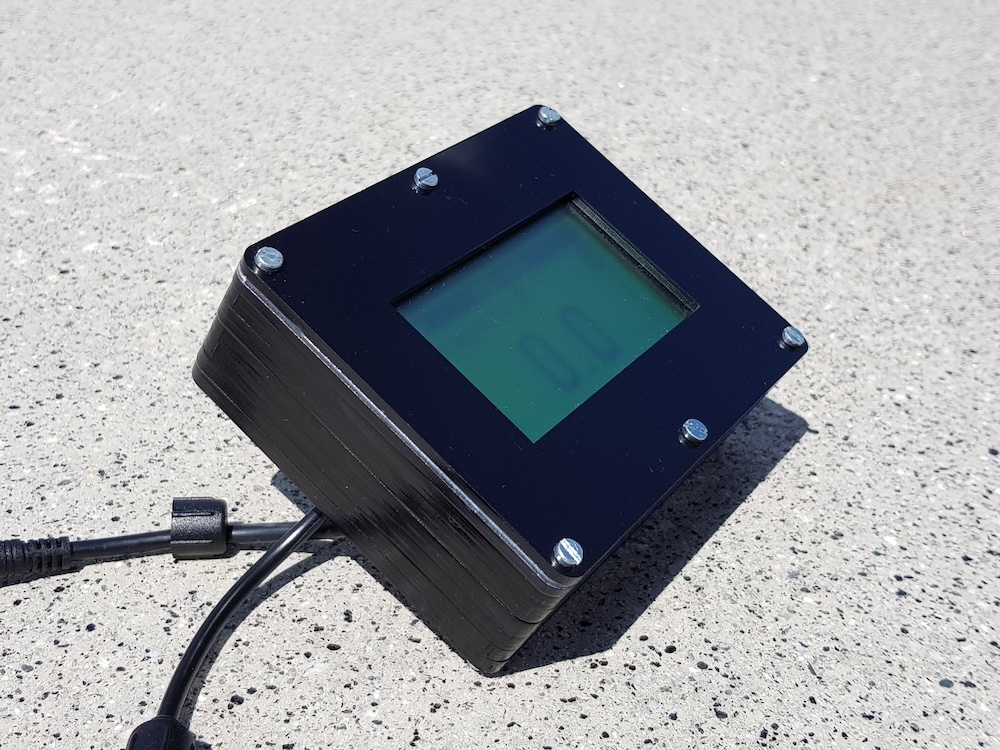
At the end, after a lot of investigation, testing and debating with myself, I ended up sticking up with a 128x64 pixels LCD display. It combines the advantages of the 7-segment displays (very readable under sunlight) and the ones that are capable of drawing more complex forms. Also, as a bonus, they have an integrated backlight that allows to see the display even in complete darkness.
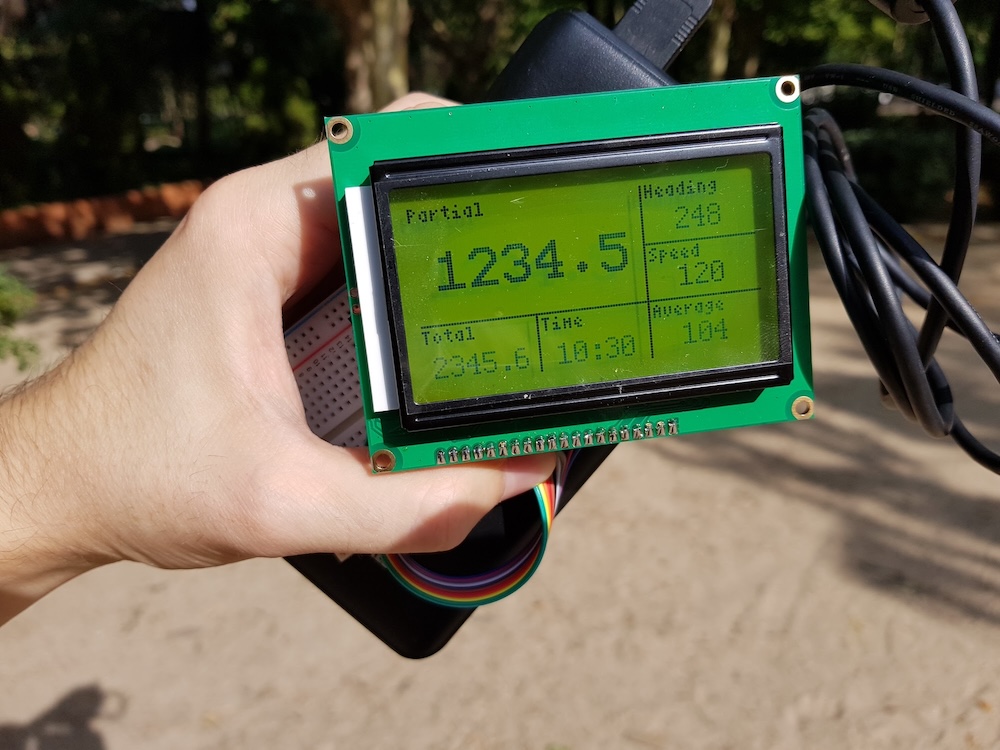 128x64 LCD display
At this point I was already showing multiple bits of information at the same time.
Microcontroller
The brains of the first prototype was an Arduino Nano; a very simple and inexpensive microcontroller that worked perfectly.
For this new version, since I had more demanding requisites, I needed something more powerful.
I chose the ESP32, a well known microcontroller made by Espressif. It’s not only way more powerful than the Arduino Nano, but also has WiFi and Bluetooth capabilities.
GPS
Although the use of a magnetic wheel sensor to calculate data is quite precise, it has some disadvantages. Especially when it’s mounted in an off-road motorcycle that is constantly exposed to the elements and under heavy use.
Because of that, I decided to implement a GPS module in its place. This way I could calculate the same information (and quite more) in a more precise way. It would also be completely integrated inside the same enclosure, with no need for an external sensor.
This change implied investing many hours on learning how the GPS system works at a low level (I recorded a complete podcast episode -in Spanish- about this topic) and how to communicate with the module.
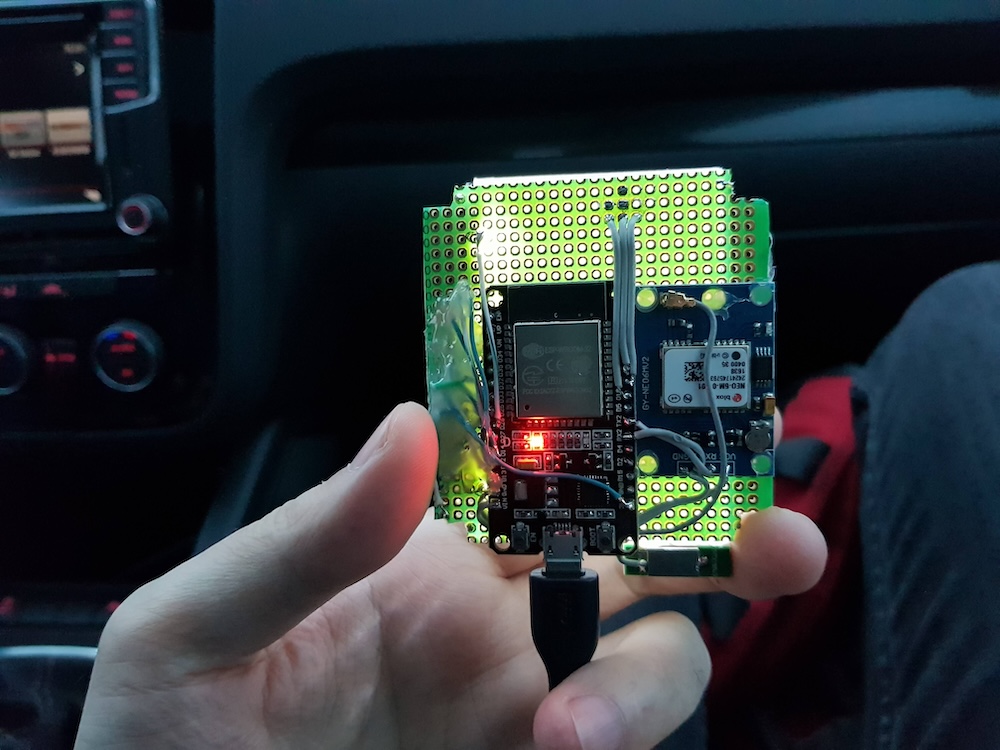
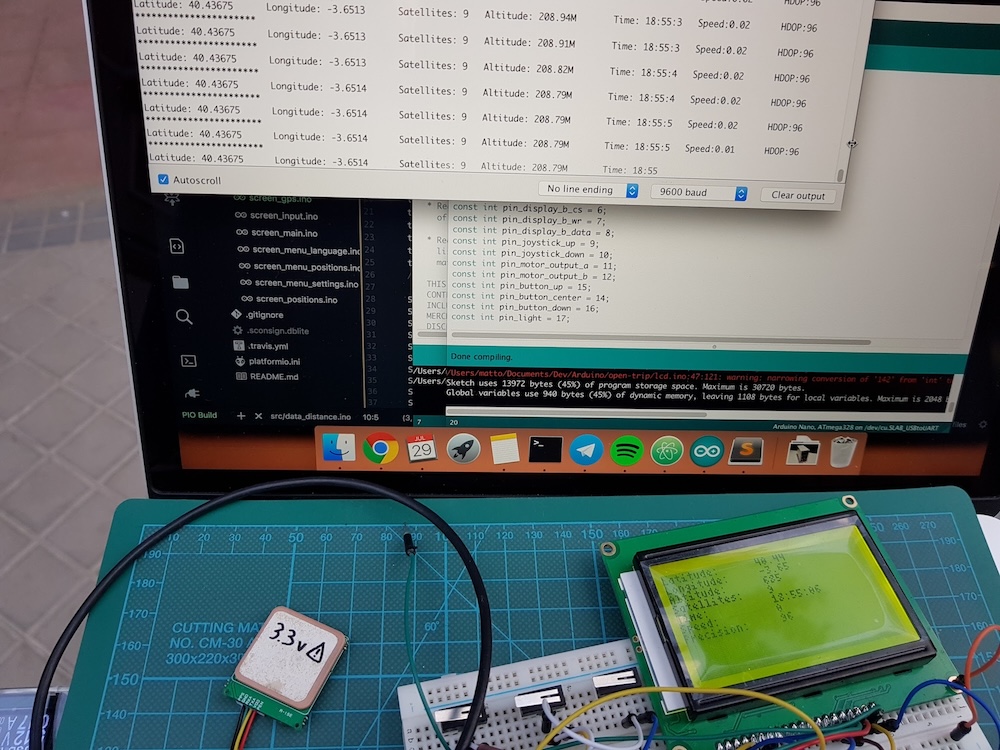 Implementing the GPS module
A great disadvantage of the GPS compared to the wheel sensor is that going through a tunnel prevents the module from receiving signal signal and renders it incapable of calculating distances. My solution to that was to store the last known position where I lost signal (point A) and get the first position when the signal is recovered (point B). Then I just calculate the straight-line distance from point A to point B. The value is not as exact, but it’s more than good enough. Usually tunnels have no curves inside, so you could assume that the pilot traveled in a straight line.
Prototype
At this point I had in my hands the first functional prototype of the Baja Pro v1. I still had not designed a PCB board yet (and I didn’t know how to do it either), but I had al soldered in place in a perfboard.
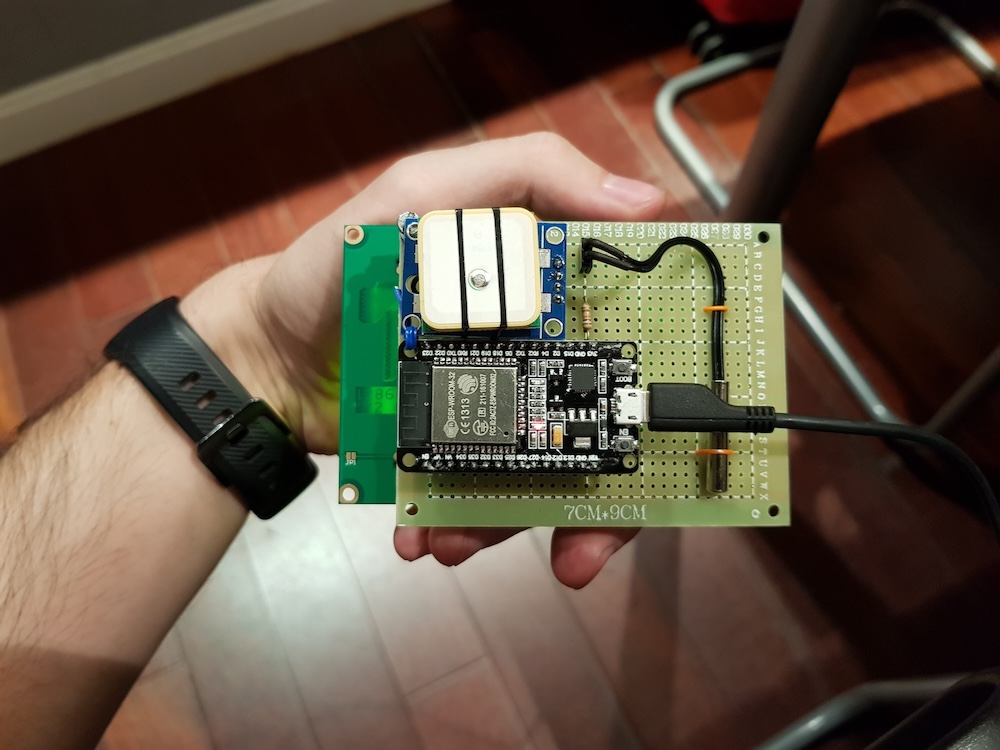 Prototype of the first Baja Pro
 Prototype of the first Baja Pro
Tests
To check that the Baja Pro was behaving as expected in a real life situation, I precariously installed it in my motorcycle and took it to work everyday for a week
During the commuting I sporadically checked the distance, speed and time values to see if they matched the ones showed by my Garmin GPSMAP64.
 First tests
To my surprise, the values were practically identical. I could not be happier.
Circuit board
Once I had the prototype well tested and knowing it was working correctly, it was time to design a PCB board so I could install the components in a more “professional” way.
Until then I had never designed a PCB board nor had any idea on how was the process. Learning this took a couple of hours, but after some time I managed to make the first design and sent it to be fabricated in China.
The result was the first PCBs I had ever designed:
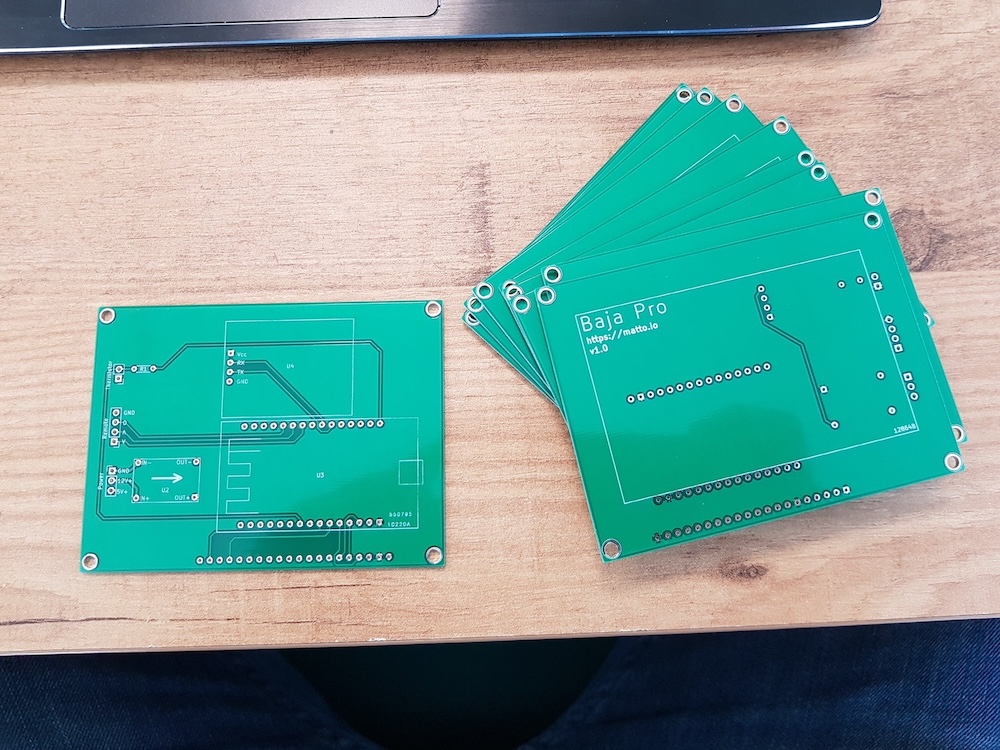 PCBs for the version 1 of the Baja Pro
As expected, I had a couple of errors with the design of this version. The most important was drawing the display pins mirrored 🤦🏻
As an extra I added pins to install a thermistor becase I always liked knowing the ambient temperature.
Enclosure
For this first version I designed an enclosure and 3D printed it using a very strong filament (ASA). Then I painted it with a special epoxy designed for 3D printed parts to make it water resistant. The finish was not specially pretty, but it worked.
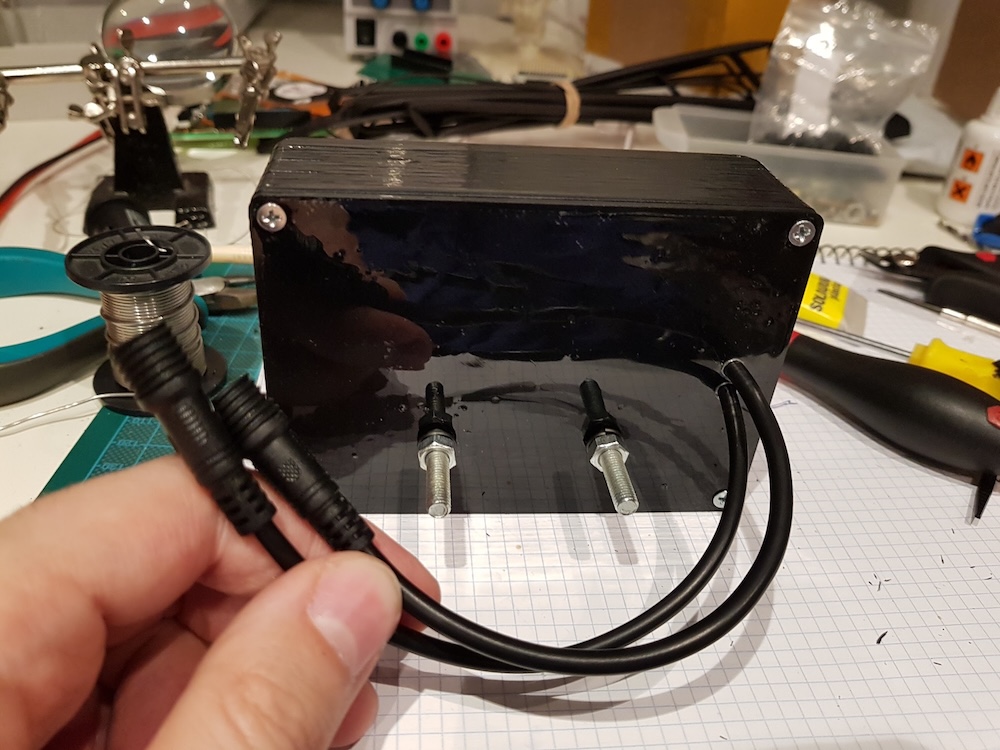 Back of the 3D printed enclosure
In this picture you can also see the first connectors I used. Even though they were perfectly functional and water resistant, they didn’t help with the looks.
Remote
For the initial prototype I had designed a 3D printed remote, but after a lot of searching through the interwebs I found a very simple and compact remote that was perfect for my needs: 3 buttons (two in the front and one in the back).
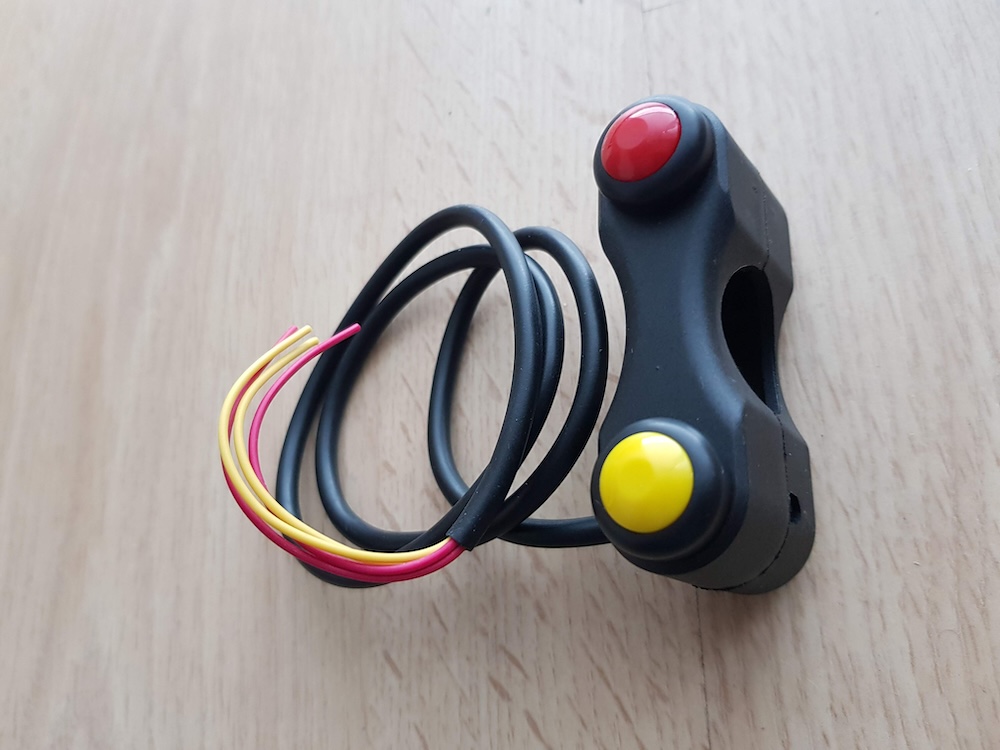
The buttons that came with this remote (the ones in the photo) were not ideal. I replaced them with other that had more quality and were water resistant.
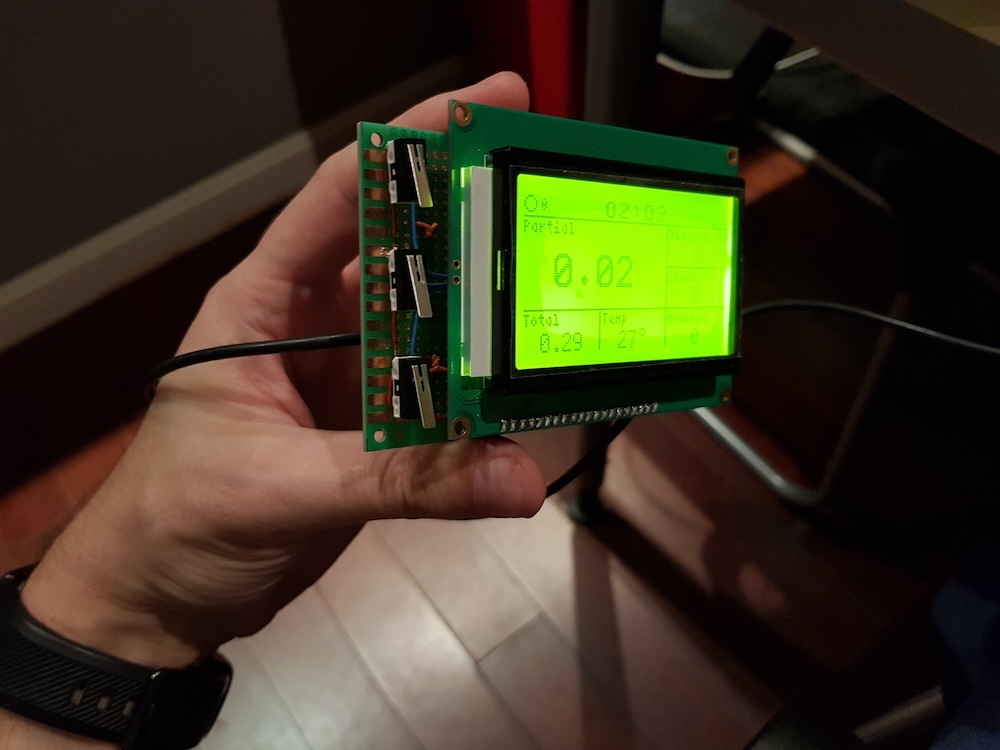
Final results
Combining all these changes with the new PCB I got the first finished Baja Pro v1.
Some of my friends asked me to make a unit for them, so I made 4 or 5 and sold them at cost value.
A few of them are still working even today after a good number of rallies. They had to go through some fixed though :)
Version 2
Using the version 1 in a real environment taught me a lot. The main one was understanding that the conditions under which we subject the electronic devices installed in a rally motorcycle are way more extreme than I had ever expected.
Vibrations, hits, water, dust, mud, rocks, heat and cold are just a few of the things that the Baja Pro must endure to be up to the task.
New enclosure
Because of the aforementioned reasons, I realised that the first thing I had to replace was the enclosure.
I can’t describe how much time, research, emails and headaches were implied in finding a solution to this. This is something I describe in detail in another episode of my podcast (also in Spanish).
I could not find the perfect candidate and I certainly could not afford an injection molding version, so I ended up designing my on version. It was made of a stack of several laser cut methacrylate layers that combined made the volume of the Baja Pro.
I also used a transparent metacrylate as the screen protector. Its surface was rough on purpose. It helped preventing reflections produced by the sun.
New PCB
For this second version I designed a new PCB with some adjustments:
- New component distribution
- Dedicated space for the GPS antenna
- Dedicated space for the thermistor
- Inverted polarity protection
- Corrected the display pins error
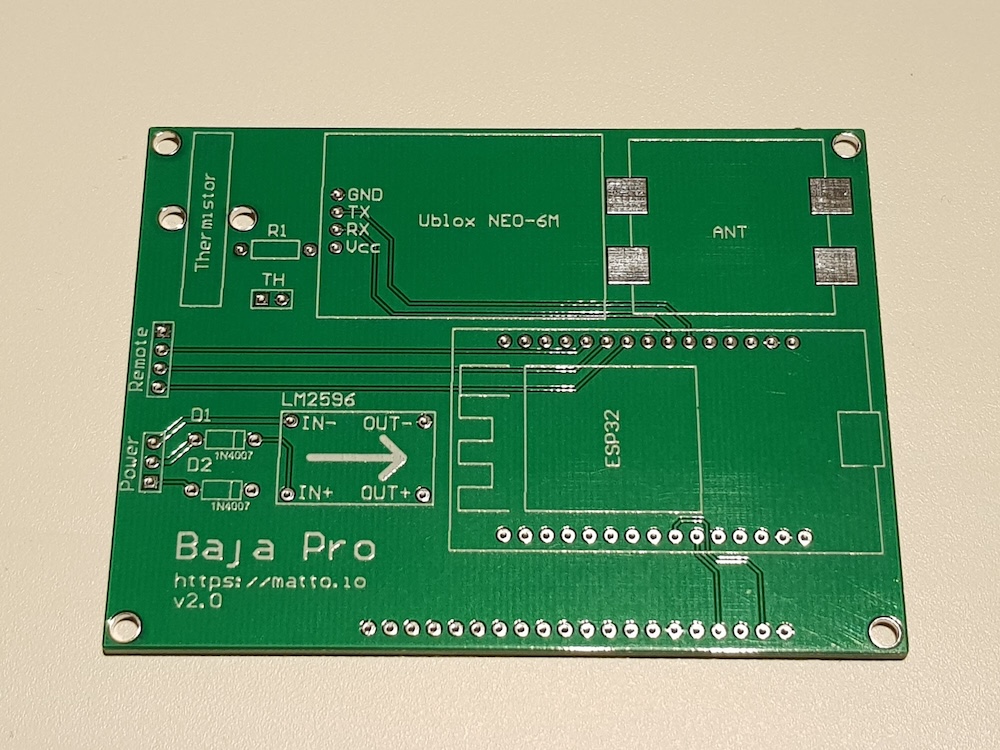 PCB for the version 2 of the Baja Pro
New user interface
Without any doubts, the most significative change for this version was the user interface.
I spent a lot of time in designing a friendlier and more usable interface where the values were shown in a clearer manner and the access to the information was faster.
Final results
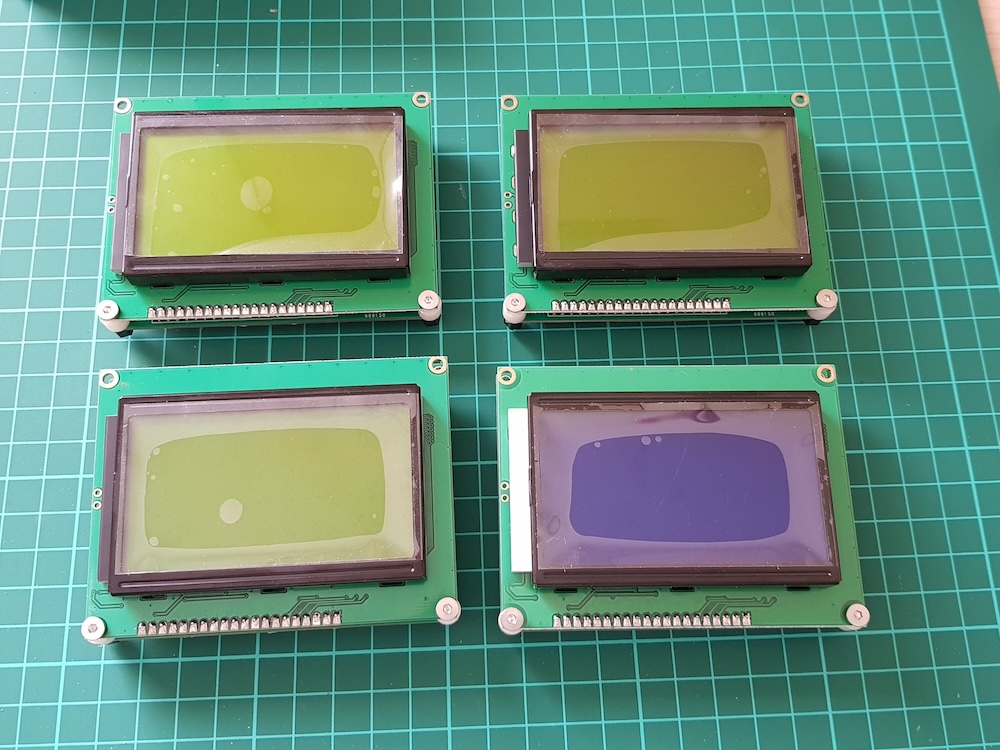
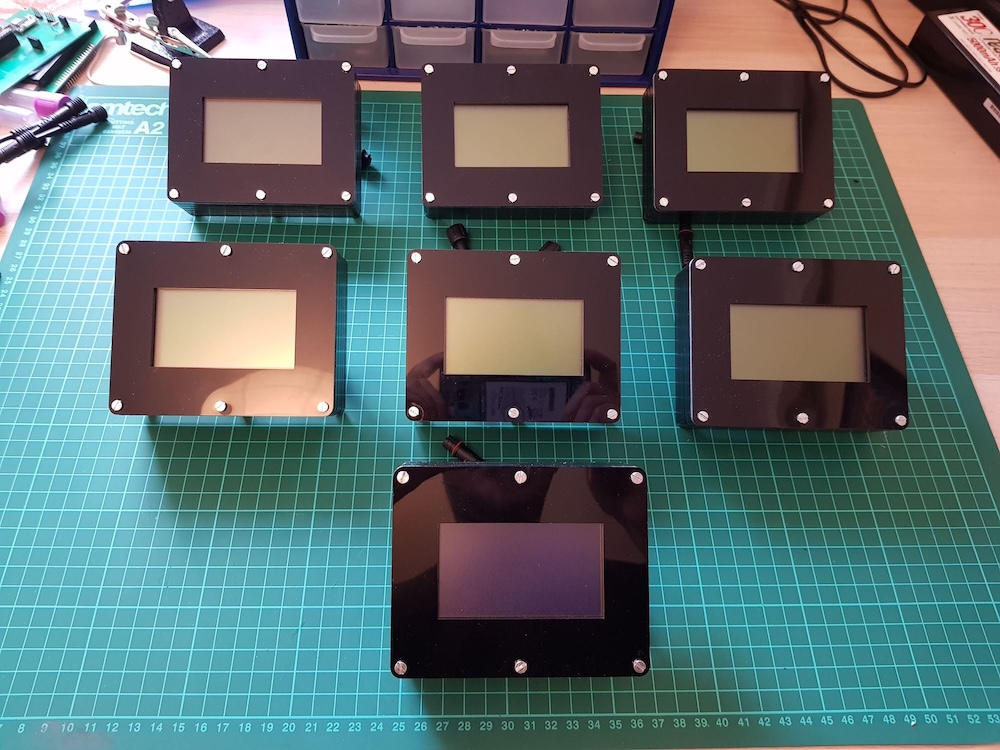
Some friends asked me again to build a few units for them (at cost, of course) so I built 7. One of them had a blue screen because it was for a Yamaha motorcycle :)
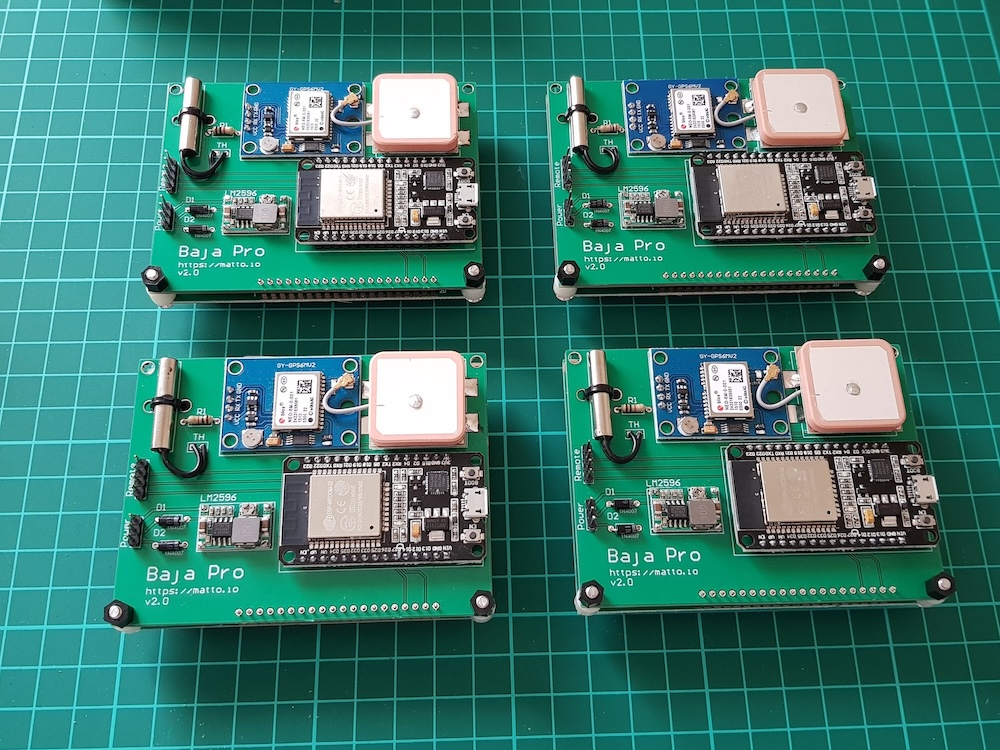 Second version of the PCB with soldered components
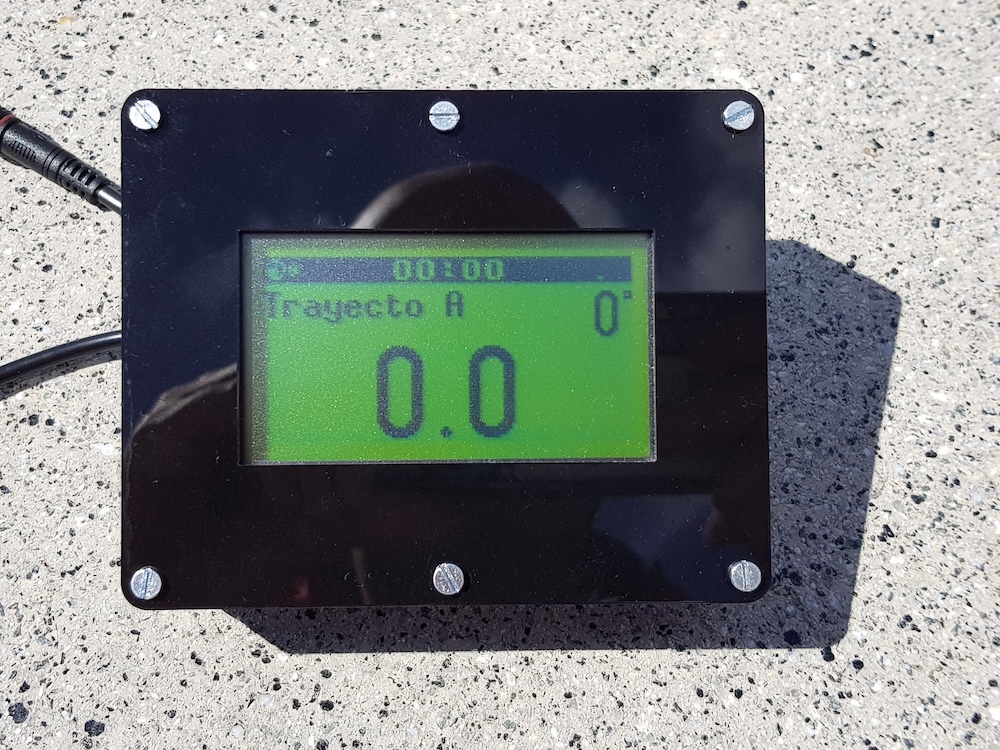 Finished Baja Pro v2

A review of all the features (in Spanish - you can turn on the subtitles)
Version 3
After a lot of testing on the version 2 we reached to the conclusion that, even though the tripmaster worked as expected, the enclosure was too heavy and bulky to be installed in a rally motorcycle. I had to find a definitive solution to the damn enclosure problem.
After buying a lot of enclosures made specifically for electronics projects, I found the holy grail: the Retex Serie 32.

This box was not only sturdy enough to endure hits and vibrations, but also had a rubber gasket that made it water proof.
The size of the enclosure was quite small, so it pushed me to improve my electronics skills to make the Baja Pro fit inside it. I had to look for a thinner display, change the GPS antenna for a smaller one and change various components for their surface mount version to save space. All of these changes required also a new version of the PCB that fitted inside the box.
New display
After a lot of searching, I found the perfect display: the ERC12864. It was very thin and the size was perfect for my needs while maintaining the 128x64 pixels resolution and the integrated backlight.
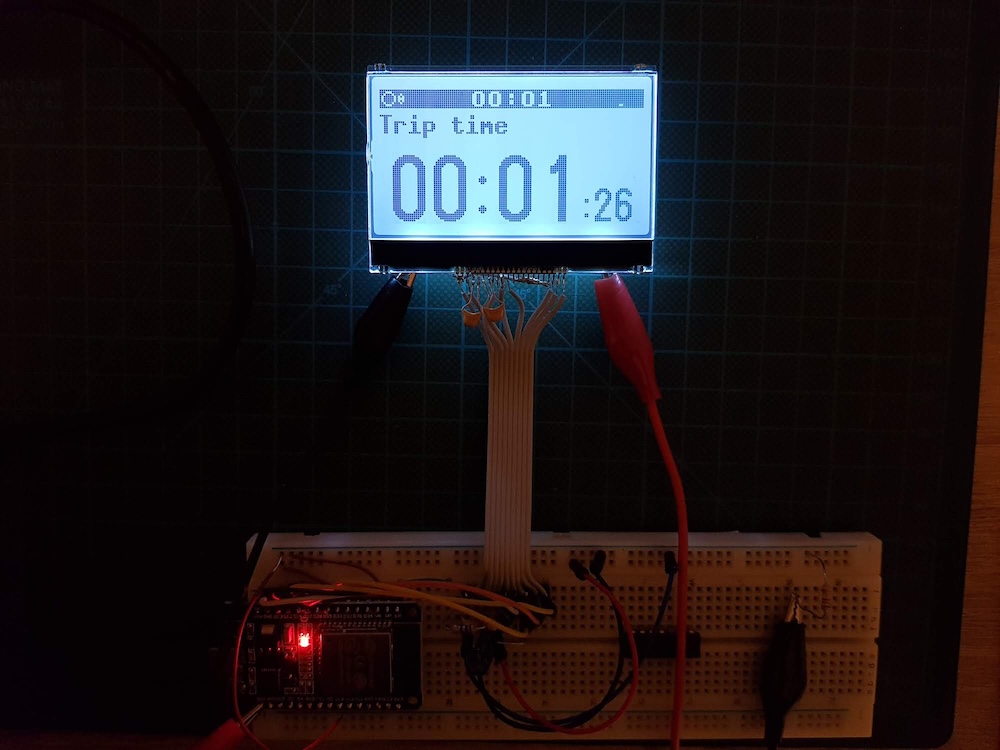 New ERC12864 display
It took a while to adapt it and make it work, but by following the manufacturer’s instructions it ended up working perfectly.
Since this display is so small, some of the components were no longer integrated in it, so I had to make some room for them in the new PCB.
New PCB
All these changes required a new PCB version. I also had to adapt its shape so it fits inside the enclosure.
To confirm that cramming all those components in a very tight space was possible, I first made a perfboard prototype of the board.
 Ugly, I know :)
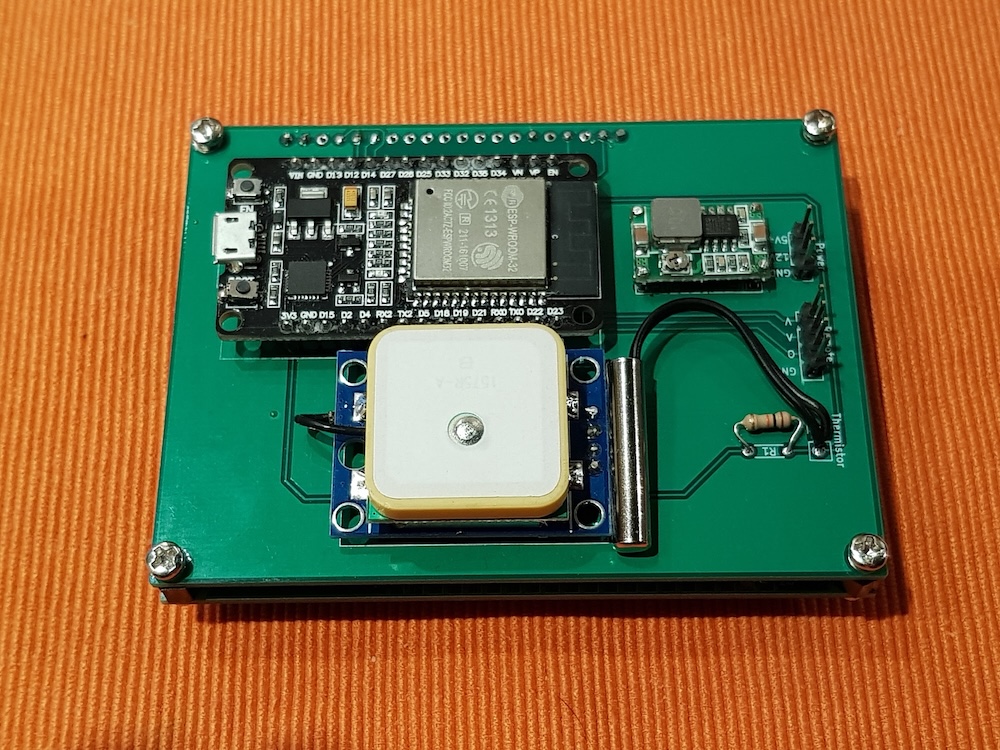
 PCB v3 prototype
Once I confirmed that the size was correct, I designed and fabricated the new board.
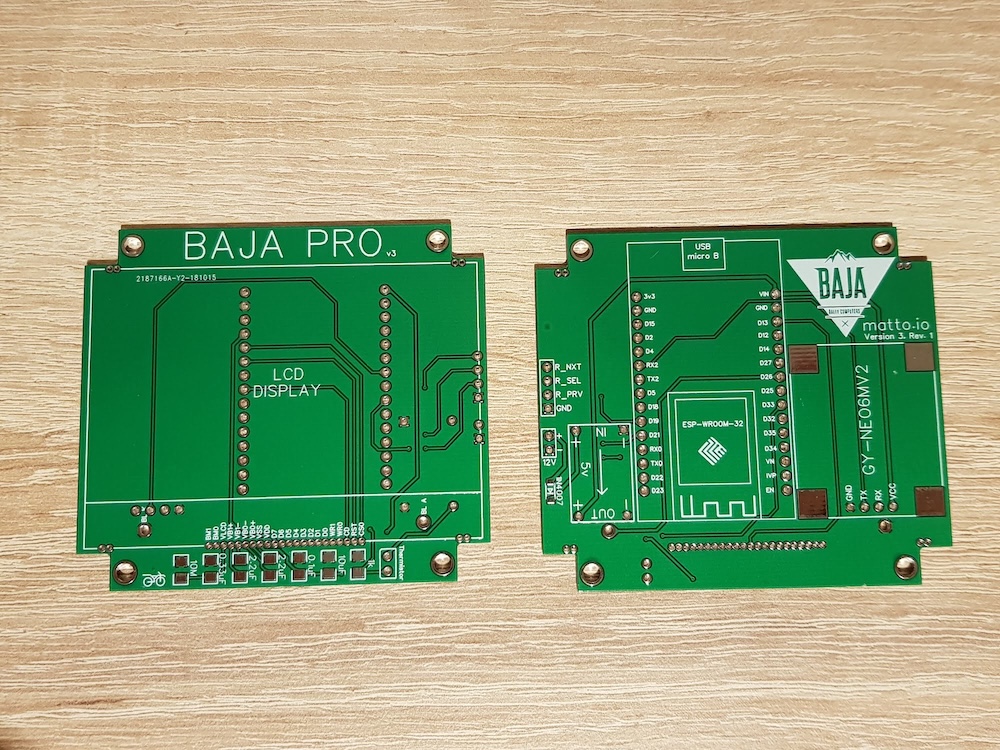 Third version of the Baja Pro PCB
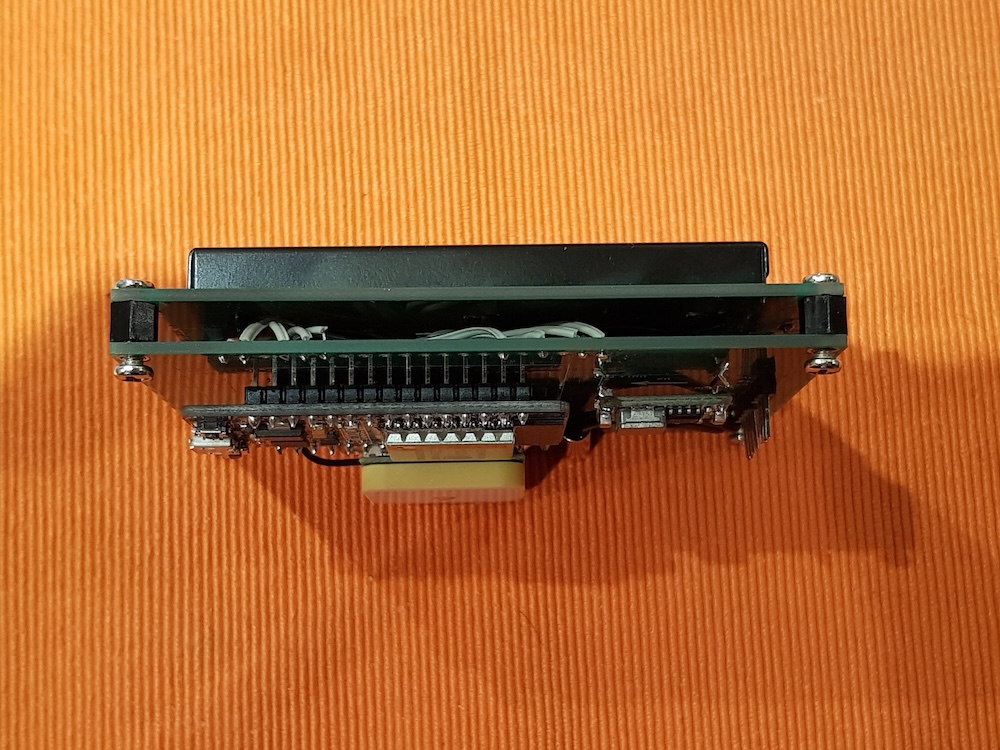
This version was specifically designed to fit inside the new enclosure and be held by screws to the supports built inside the box.

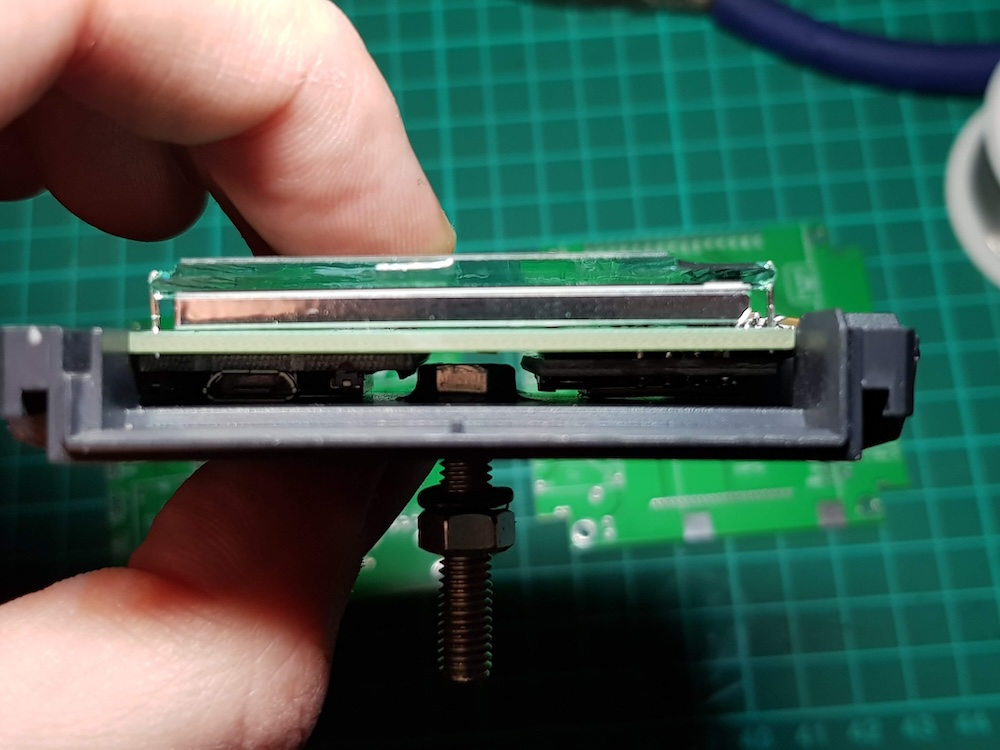 Lateral view of the board inside the enclosure. Here you can see up to what extents I had to miniaturize the whole device
New GPS antenna
Given that the space inside the new enclosure was much smaller, the old GPS antenna was no longer an option. I found a good alternative that was way smaller and worked as good. An added advantage was that with the new location the antenna was pointing to the sky, which was ideal.
 The new GPS antenna (top left corner)
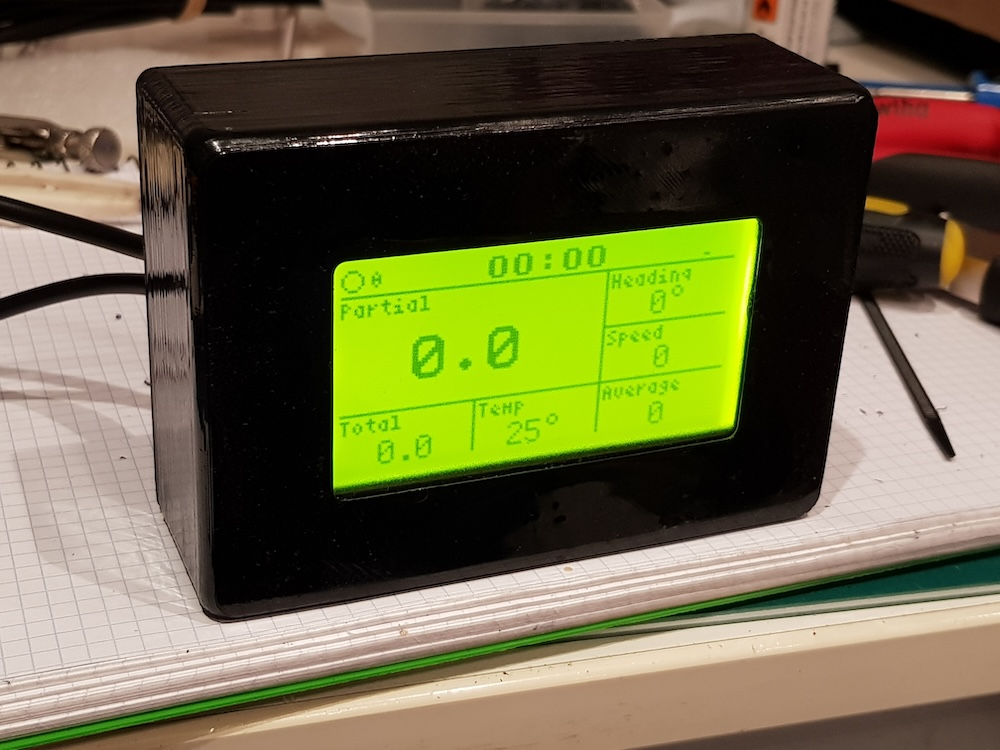
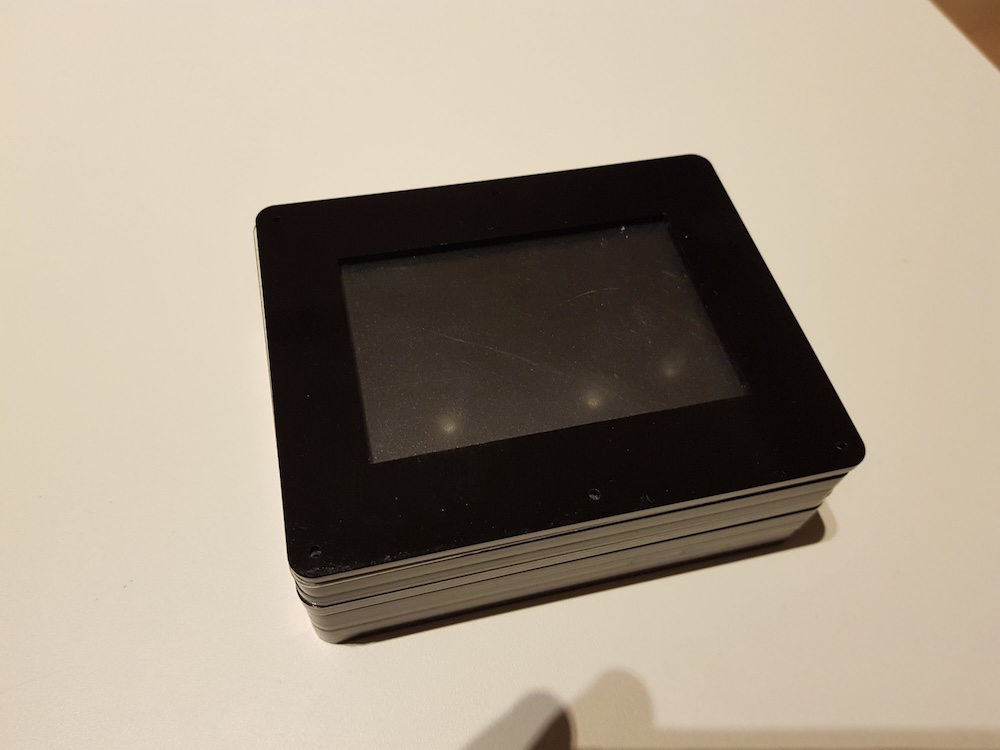
Final results
At this point I had a sturdy device with a size that was more like what I was looking for.
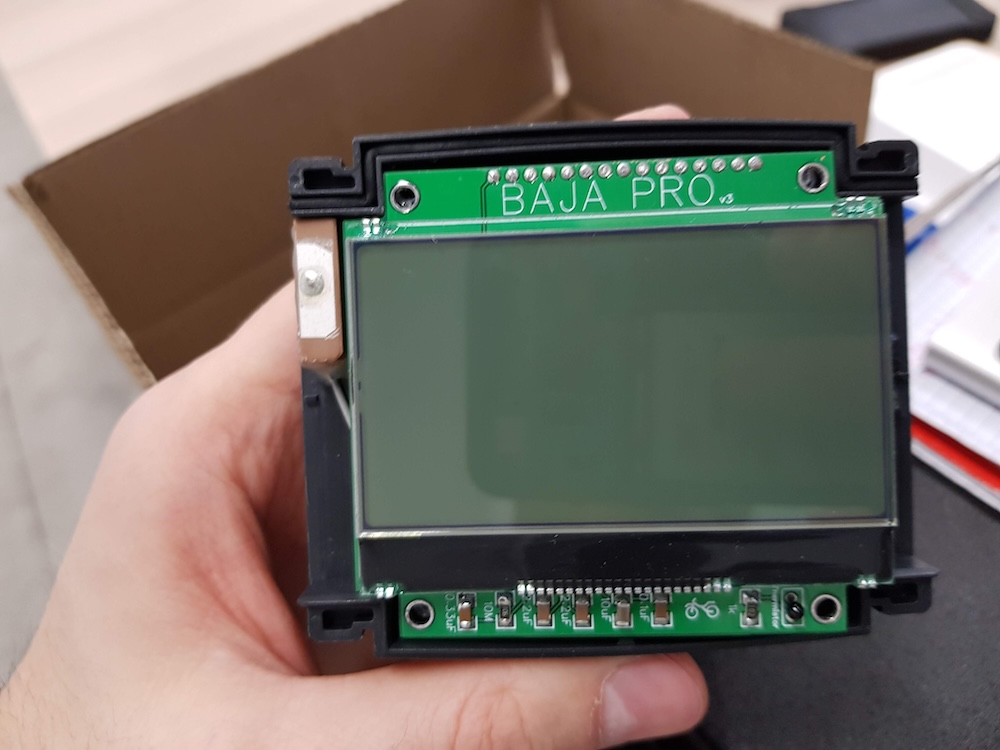
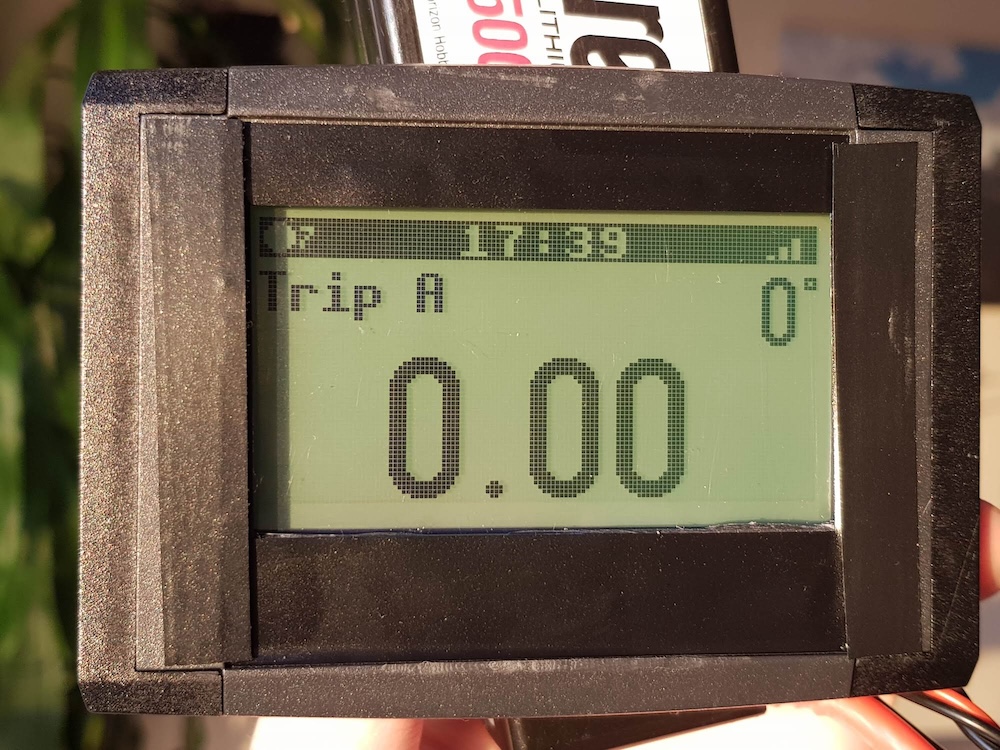 The first Baja Pro v3
Version 4
Once I had version 3 tested and working, I decided to make the definitive versión. The one that would be out for sale.
This one should be the most well-finished version inside and outside.
New GPS module
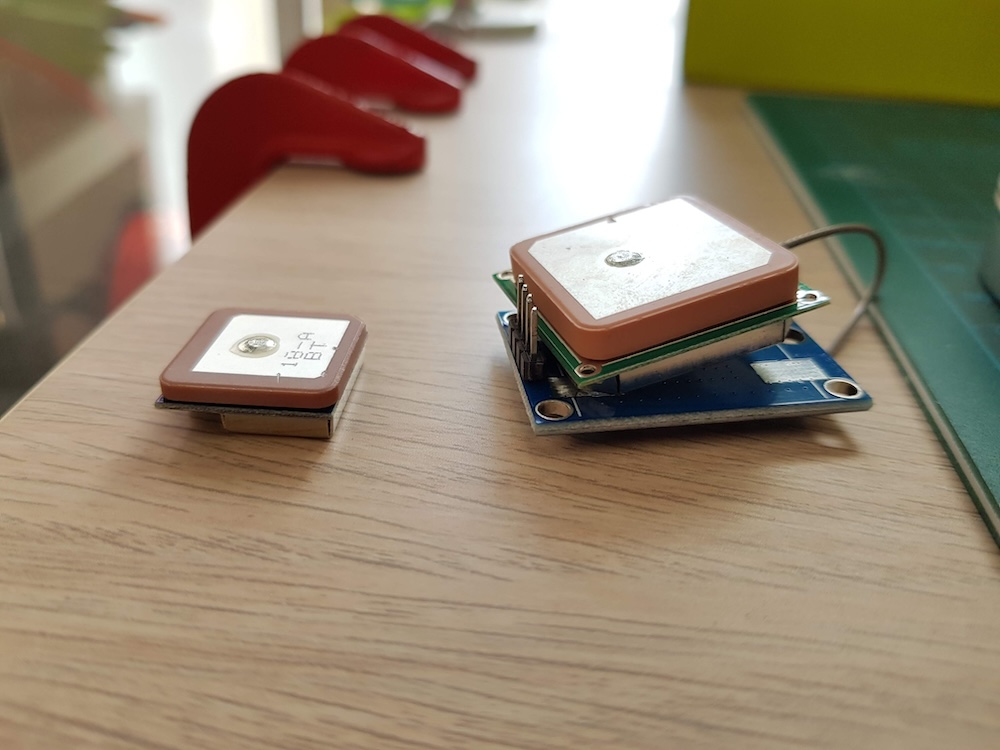
For this version I decided to change the GPS module for a new one that not only supported the regular GPS network, but also worked with Glonnas (Russion system), Galileo (European system) and Beidou (Chinese system) so the times to get a GPS fix were way faster and the accuracy was also improved.
All this in a package that had an integrated antenna and was way smaller than its predecessor.
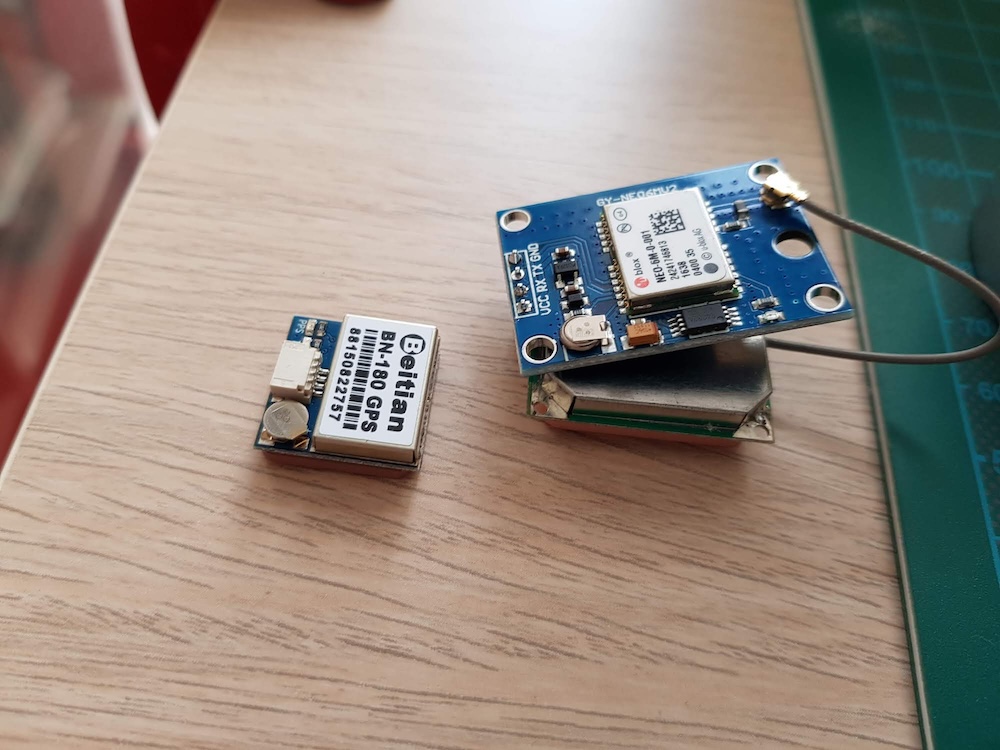 New module on the left, old module on the right
 New module on the left, old module on the right
New PCB
The fact that the new GPS module had an integrated antenna forced me to redesign the circuit board to make room for it. The only solution I found was to make a hole in the PCB.
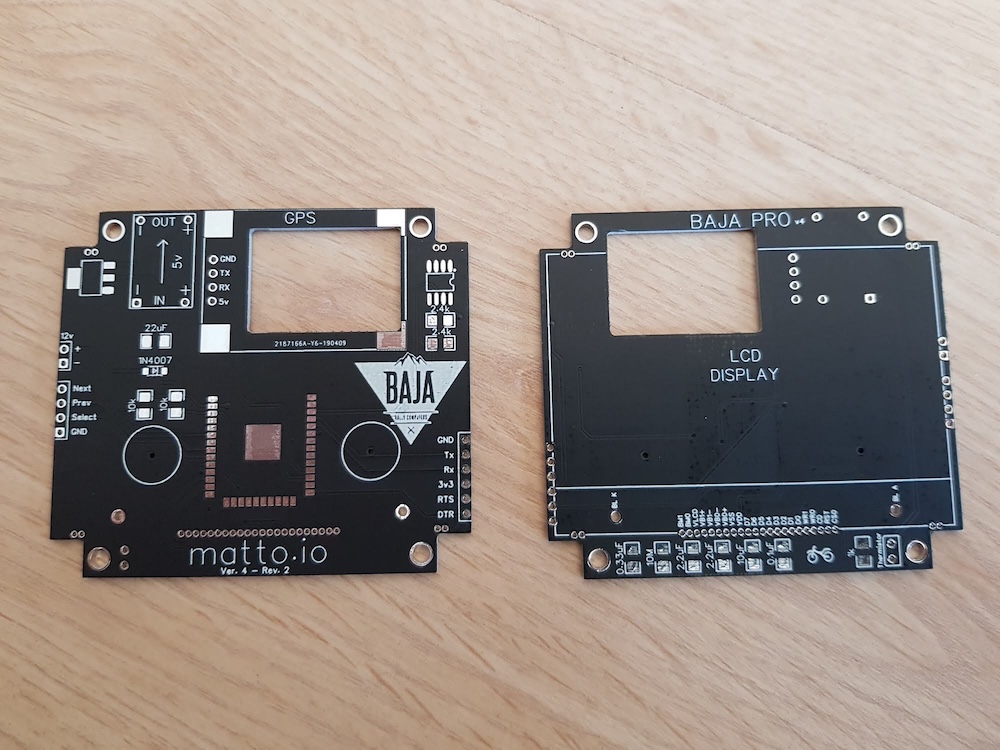 Version 4 of the PCB with the hole for the GPS module
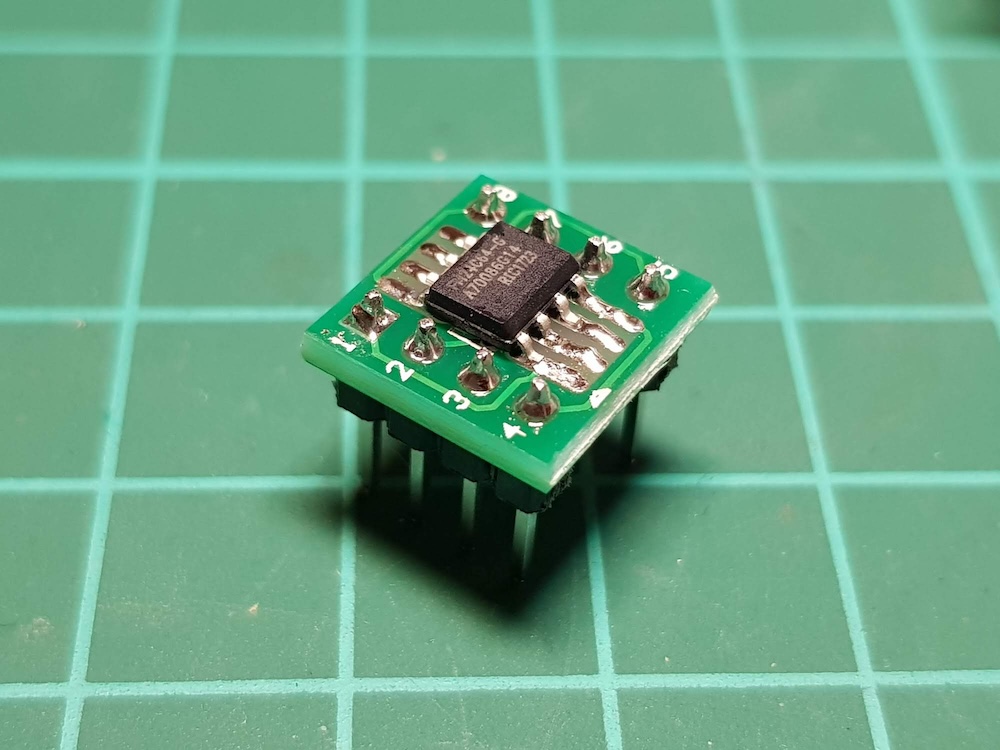
Shrank microcontroller
Up until now I was using what is know as a “devkit” of the ESP32. This is a breakout board that gives you some useful features like a USB system and easily accessible pins.
Since I had to redesign the PCB to accommodate the new GPS module, I took the opportunity to do something that I was planning for a while now: implement the bare ESP32 module (without the devkit). The advantage is that the space it takes is way smaller.
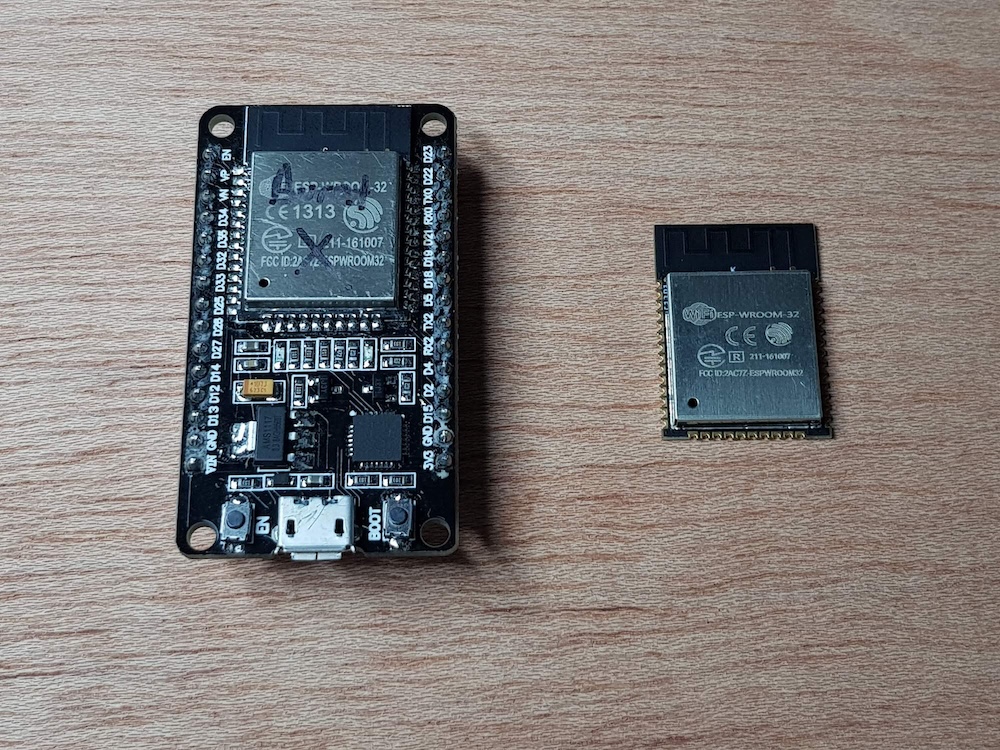 On the left, the devkit I was using before. On the right, a bare ESP32 module.
Although this adds some complexity (for instance, it uses 3.3V instead of 5V), it makes for a cleaner and more professional look while also saving a bunch of space.
Memory
Memory was another of those big challenges that lead me to learn a lot about a topic that I had no intention to research.
The Baja Pro had to store information somehow. The values for partial and total distances, average and max speed, configuration parameters, etc. could not be lost every time the pilot turned off the motorcycle.
Up until then, these values were stored in an EEPROM memory that lives inside the ESP32. The problem is that this memory “wears off”. It has a limited number of write cycles (approximately 100.000 cycles). After that it starts to fail.
To solve this problem what I initially did was to wait until detecting that the motorcycle stopped moving (based on the speed values obtained from the GPS) and only the save to memory. This saved a lot of writing cycles compared to storing the data periodically, but had a big problem: A lot of pilots are used to turn their motorcycles off before arriving to their destination and continue rolling with the inertia. When the bike was turned off, also was the Baja Pro and it had not detected that the speed had reached 0. What happened then was that all of the values accumulated up to that point were lost. This, in a navigation rally, is unacceptable.
I spent a lot of time thinking in a solution for this. Finally I found an alternative that is also used by the automotive industry to solve problems like this one. It’s a fairly new memory built by Texas Instruments called FRAM (an acronym for Ferroelectric Random Access Memory).
 FRAM module
An FRAM module guarantees 100 trillion write cycles and keeps the stored data for a period of 100 years or more. Incredible.
This is obviously way more expensive than a conventional EEPROM memory, but it was exactly what I needed. I could now store all the data periodically with no fear of memory wear. Problem solved.
OTA updates
Another idea that I had in mind was the ability to update the firmware version of the Baja Pro over-the-air.
As I mentioned before, the ESP32 has WiFi capabilities. This is a great advantage because it will allow the Baja Pro to communicate with a server, check if there is a new update and download it.
The fact that the Baja Pro had only 3 buttons as the input made the WiFi connection a non trivial task. I would have to code an entire keyboard interface and create some kind of connection wizard just for this functionality. A lot of work to make something that was not user friendly at all.
After giving it some thought I got the idea of turning it all the way around. The Baja Pro would always try to connect to a predefined WiFi network using a predefined password. So, to update it all you had to do was to create said network with your mobile phone and the Baja Pro would connect through it and automatically download the updates. Simple.
New connectors
The next component I decided to upgrade were the power and remote connectors.
After a lot of research I found that the best option would be what is known as an “M8 sensor connector”.
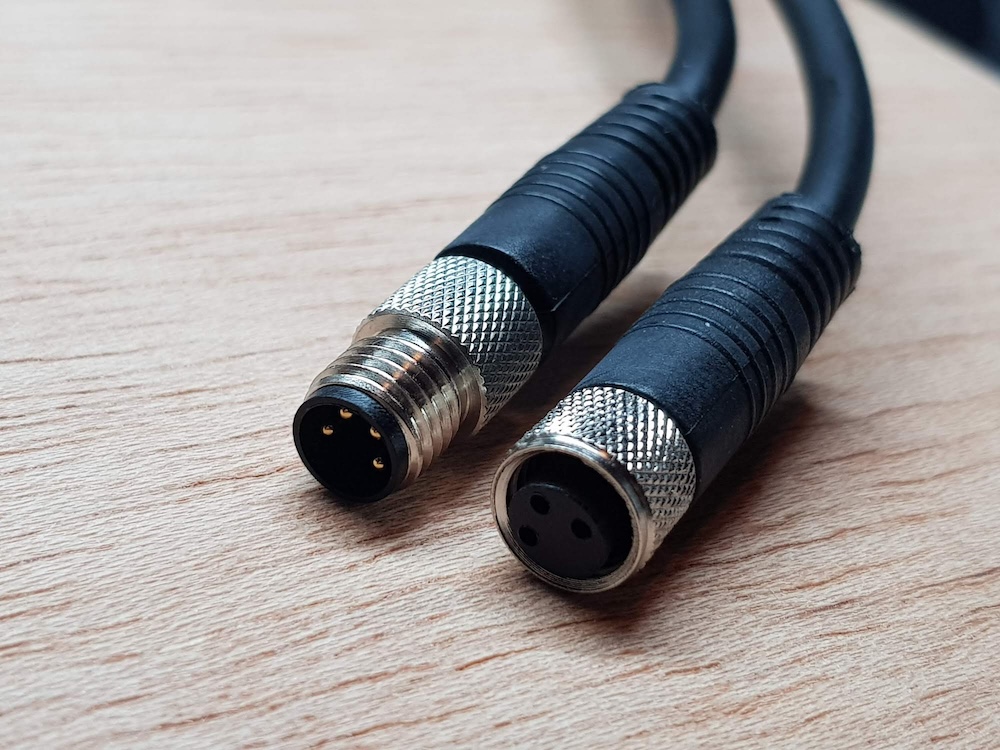 M8 sensor connectors with 4 and 3 pins respectively
These connectors were not only of a much better quality, but also are a standard in the tripmasters world. This allowed me to make the Baja Pro compatible with an existing cable installation in a motorcycle. The idea was to allow the pilot to switch an ICO for a Baja Pro and vice-versa without having to redo the whole cabling of the bike.
New remote
Since I was in the “upgrading” train, I decided to improve the quality of the remote also.
Previously it was made of plastic. From now on it would be made of metal and would have the new connector.
 New metal remote with the M8 connector
Enclosure improvements
The enclosure needed a window for the display. Until now I was cutting it manually with horrendous results. I had to do something about it.
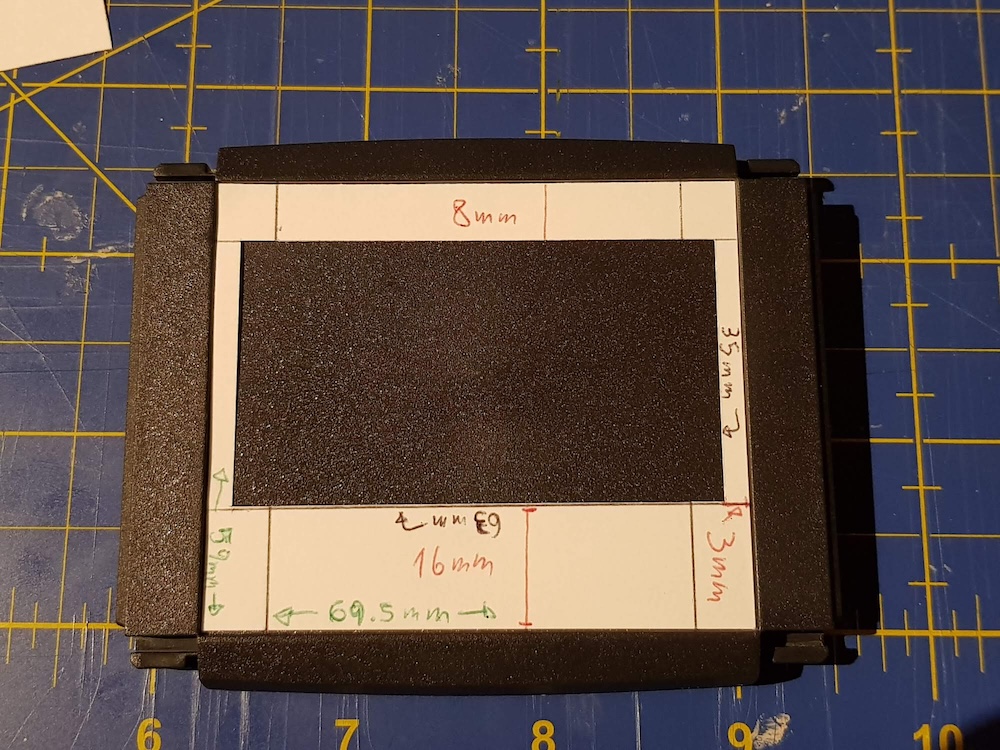 Enclosure window cutting template
Anyone could say (and they would be correct) that I used the enclosures excuse for something that I wanted to do for a long time: to buy a CNC machine.
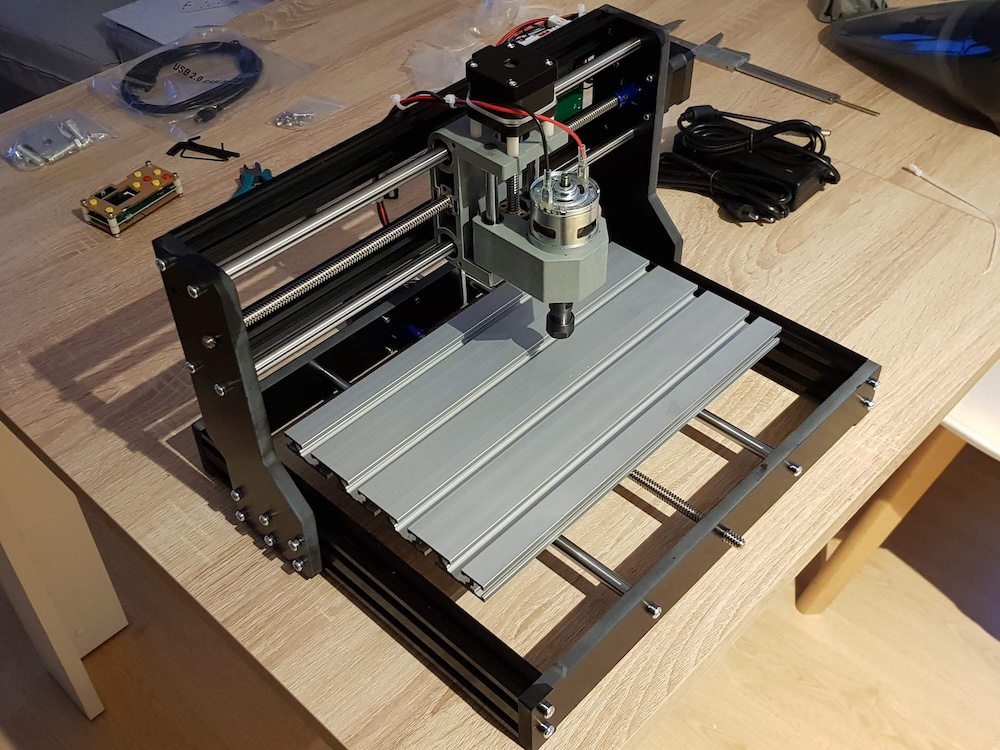 My new CNC machine
Even though it was a very small machine, it allowed me to cut the enclosure windows with a precision that was quite higher than before.
For that I built a wooden rig using the same machine. This rig allowed me to place an enclosure inside and it will ensure that it always was aligned in the same position, making the automation of the process way easier.
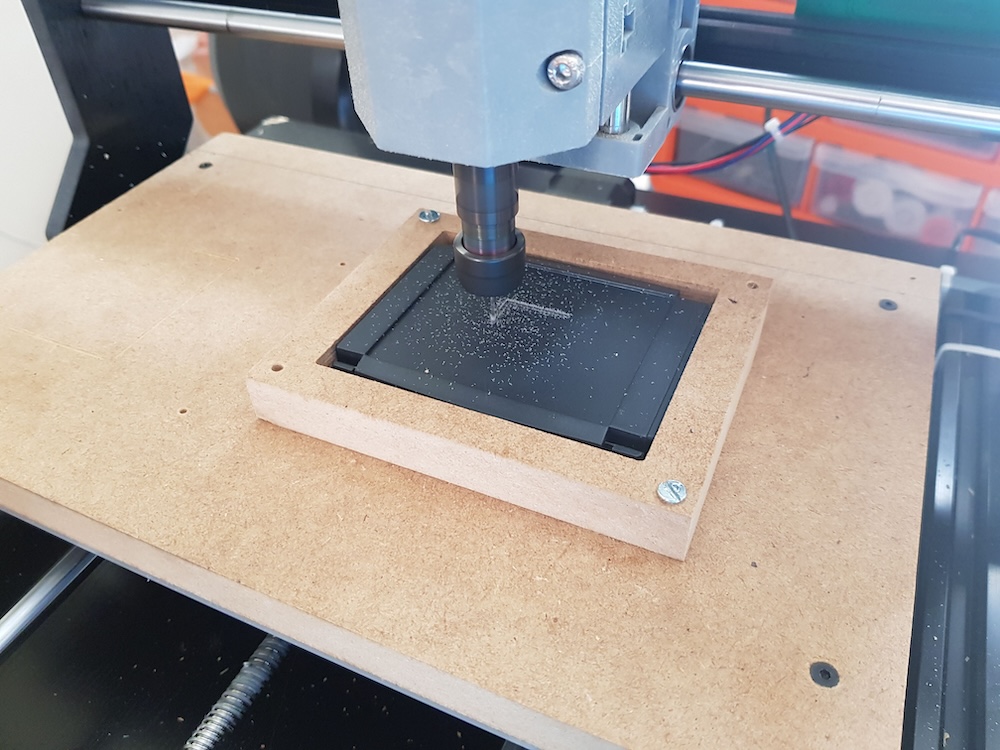 Cutting an enclosure window
The CNC machine also allowed me to cut the metacrylate screen protector with great precision. It fitted perfectly.
 Both items cut with the CNC machine
Once I gained a bit more trust with the machine, I started engraving the Baja logo in the screen protectors.
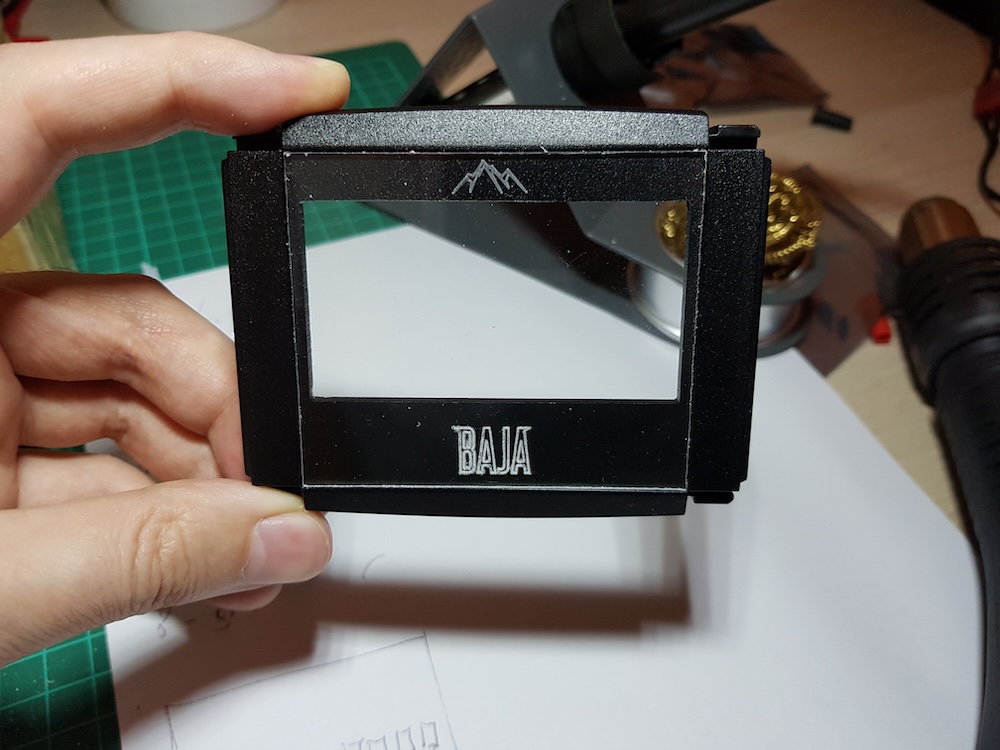 CNC engraved logos
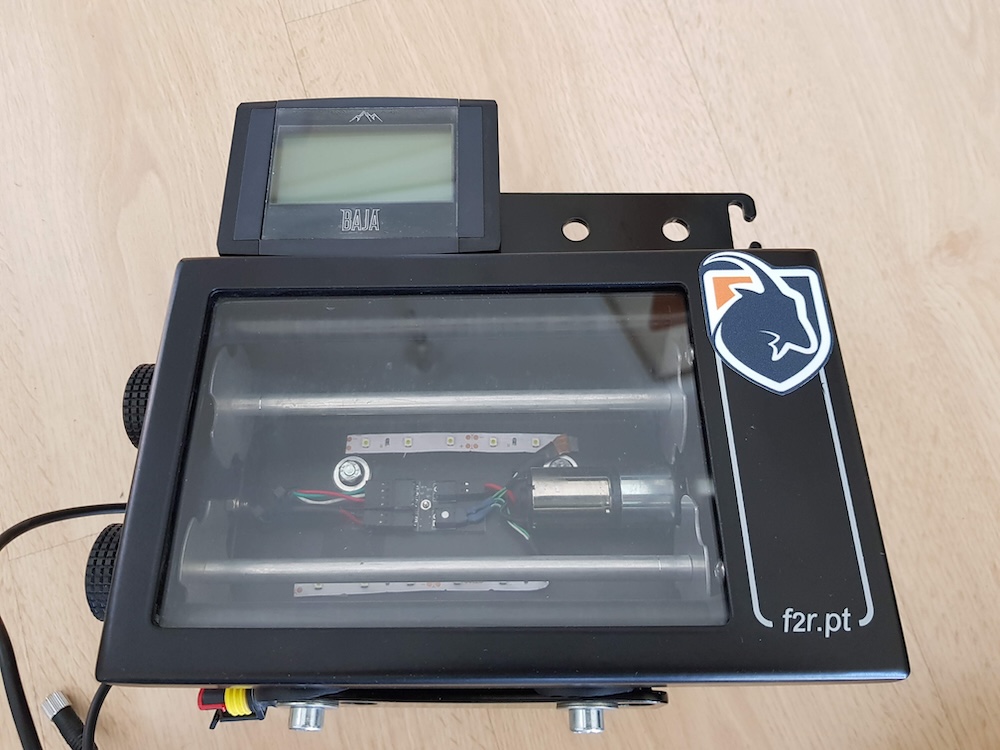
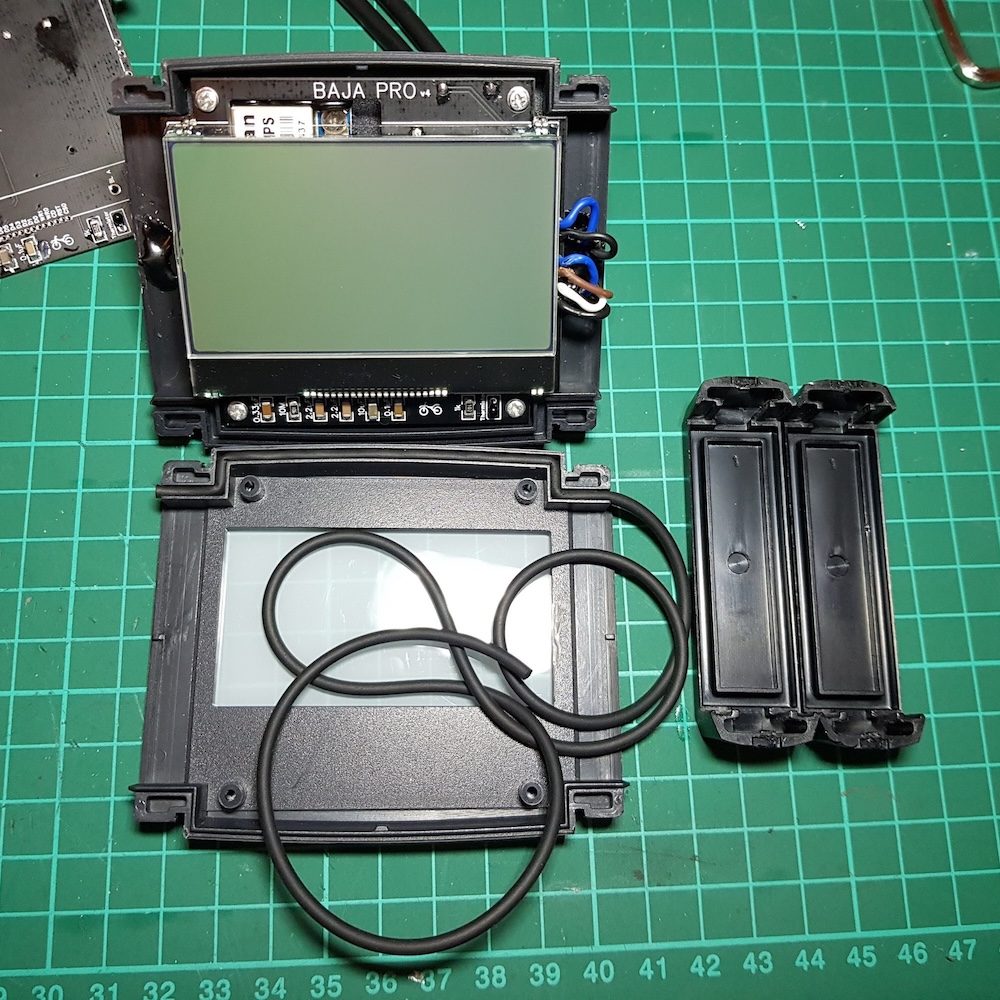 Full assembly
Final results
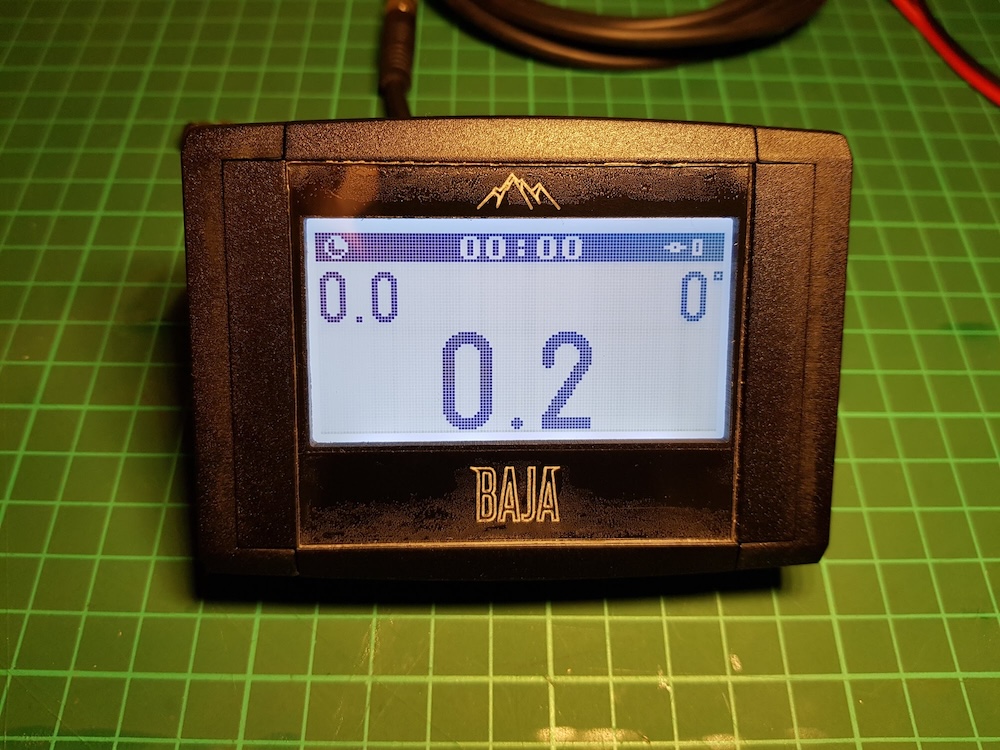 A finished Baja Pro v4
This was starting to look like a product that could be sold.
The web
Nowadays it’s very difficult to promote a product without having a webpage.
I made a very simple one that showed the main features of the Baja Pro.
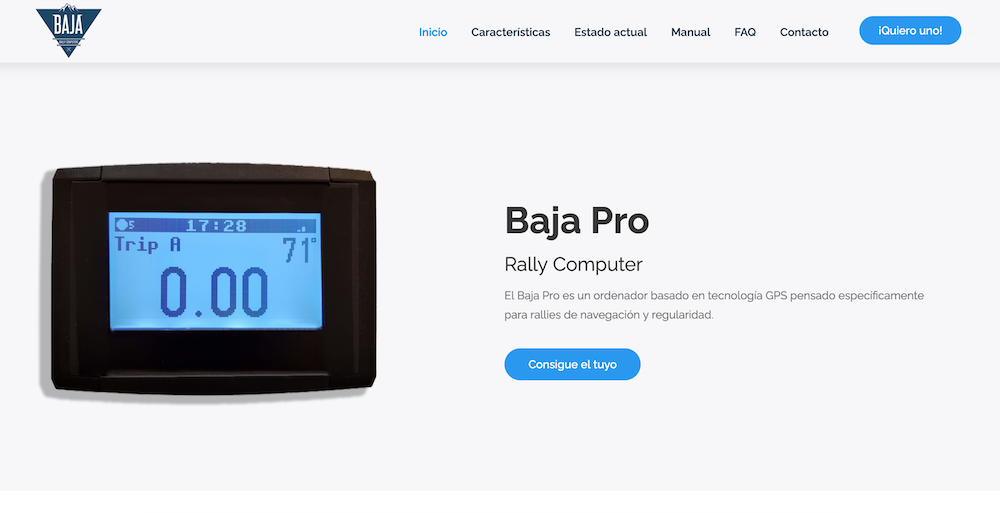
The web is still up and running:
In the same web you could download the user manual, subscribe to the mailing list to get updates, read some reviews and a FAQ section.
The first (and only) batch
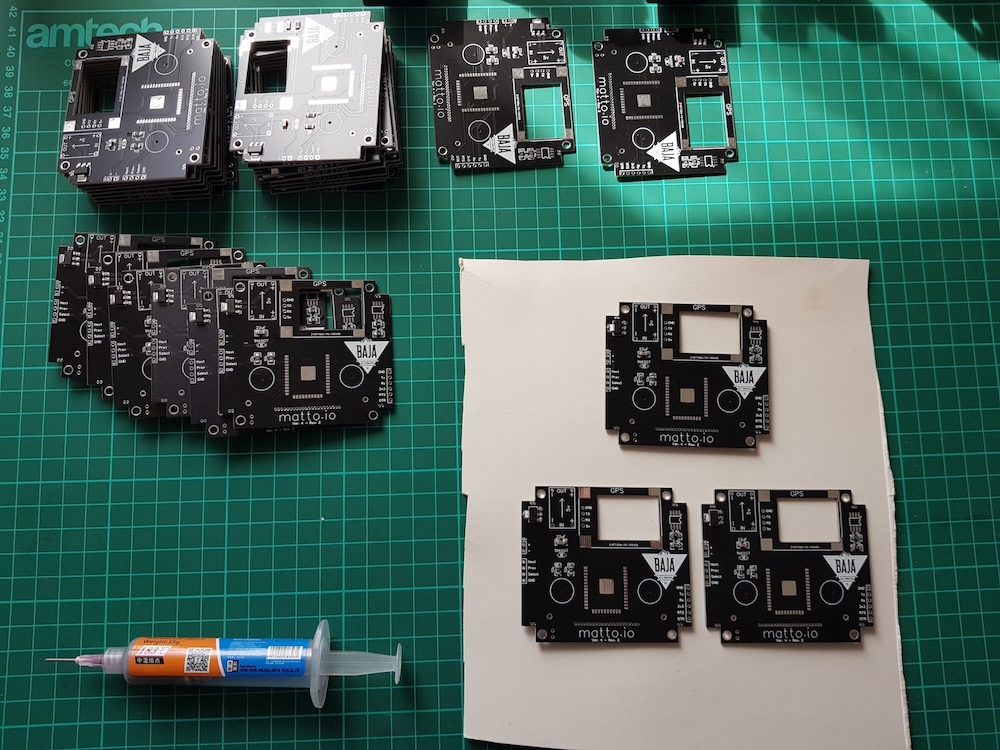
Having all of these improvements I was ready to fabricate the first Baja Pro batch and put them for sale.
Time and budget were my limiting factors. I decided to make 25 units. For that I had to buy all of the components, flash the microcontrollers, solder all of the electronics, cut the windows in the enclosures, cut and engrave the screen protectors, cut and solder the cables, changing and soldering the remote buttons and a long etcetera.
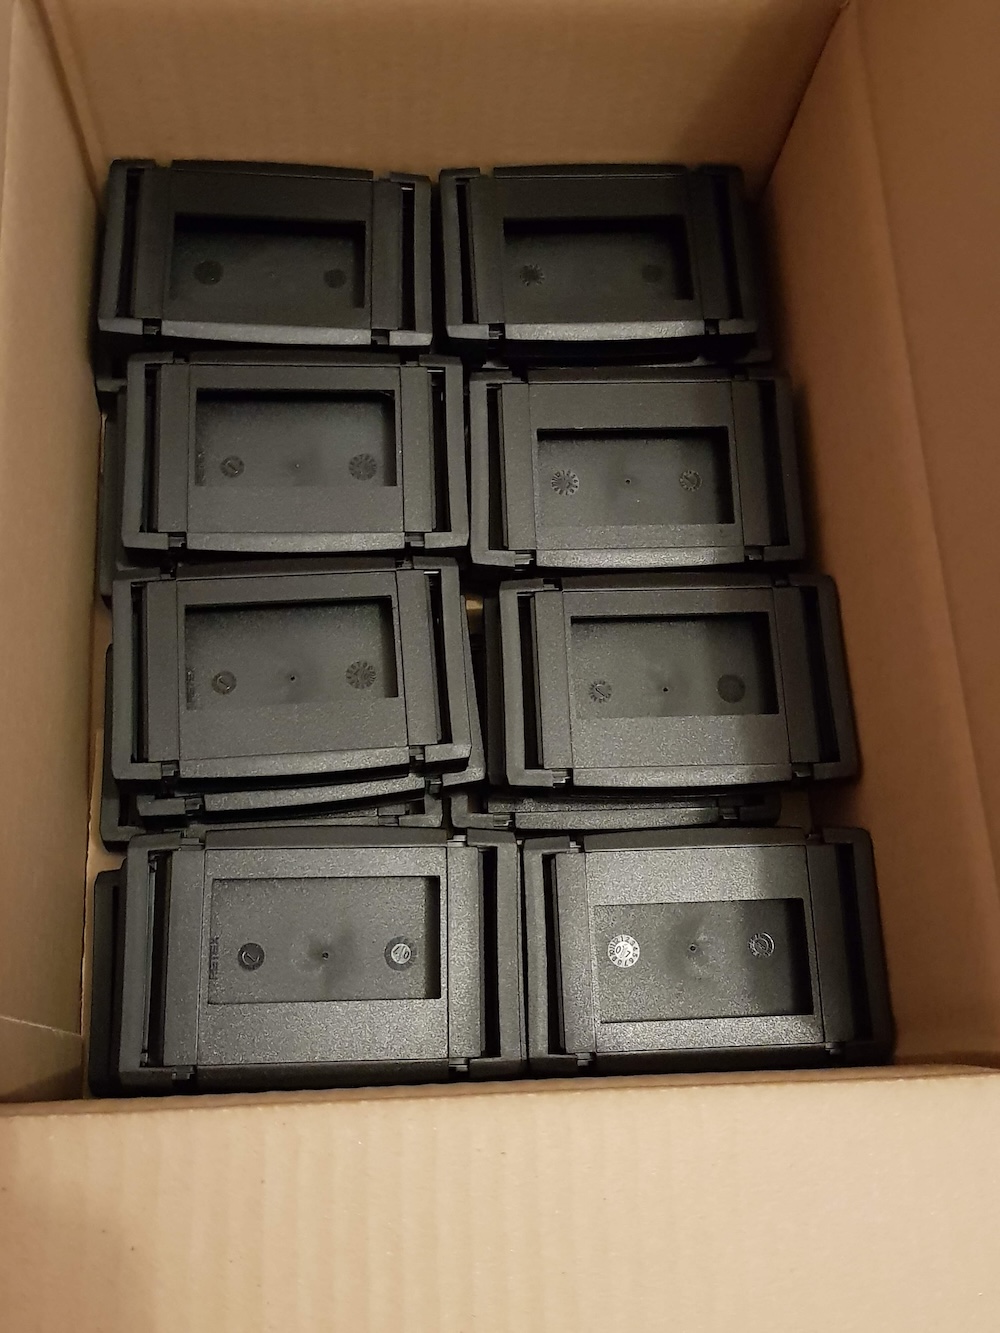
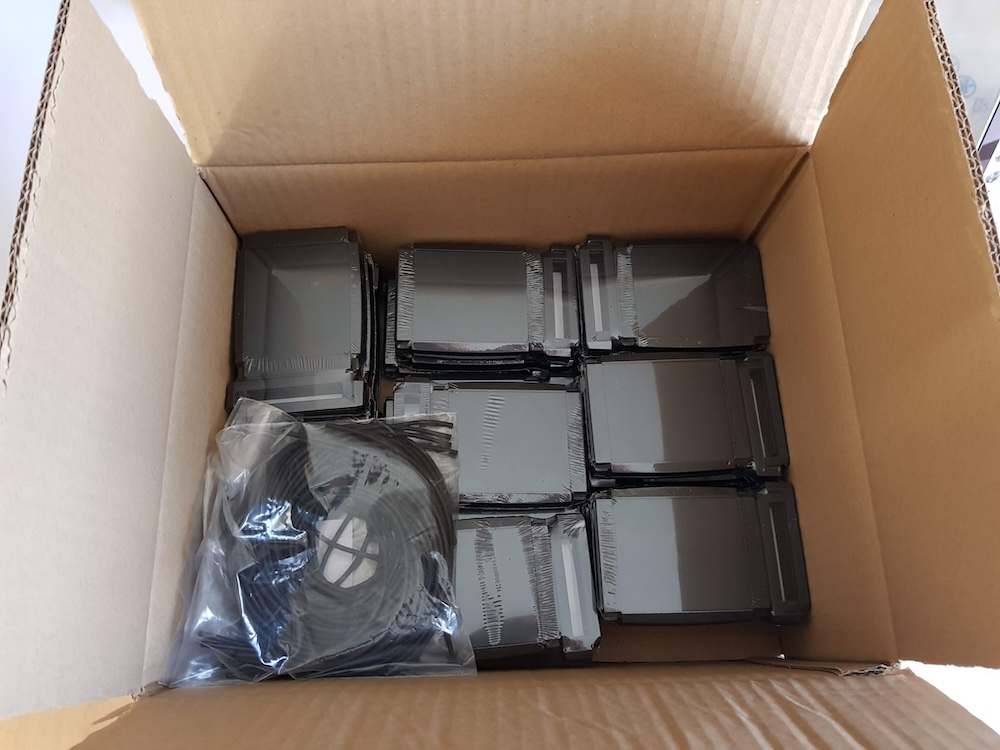 The enclosures order
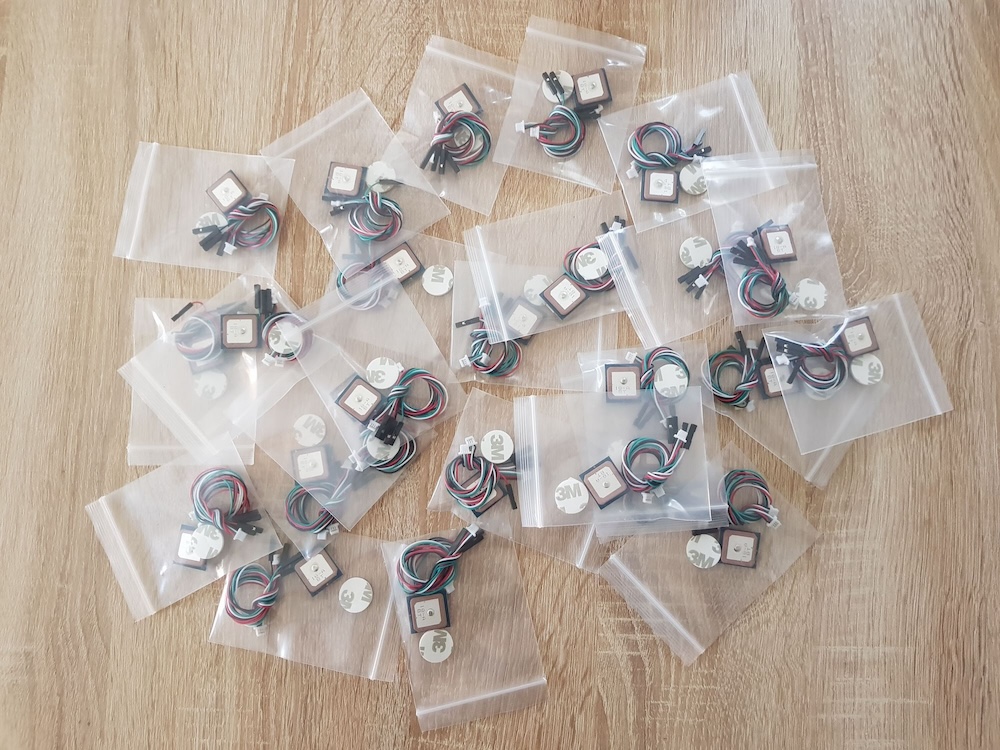 The GPS modules order
 Soldering surface mount components
 Enclosures with their respective windows already cut
 Enclosures with a double sided tape to install the screen protectors
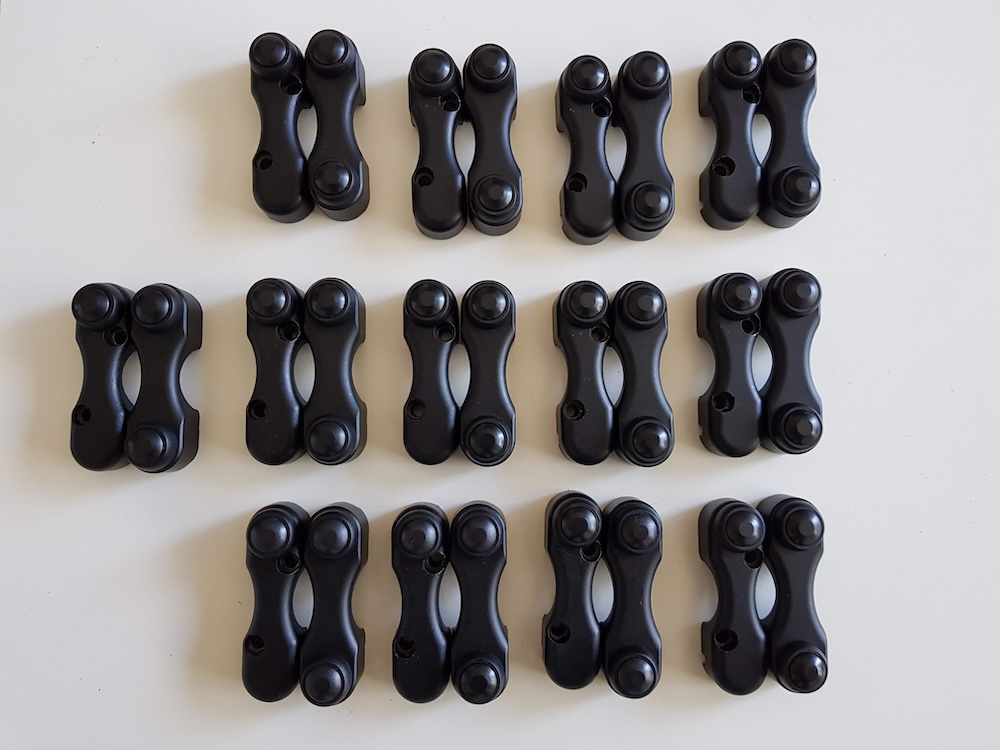 Remotes with the waterproof buttons installed
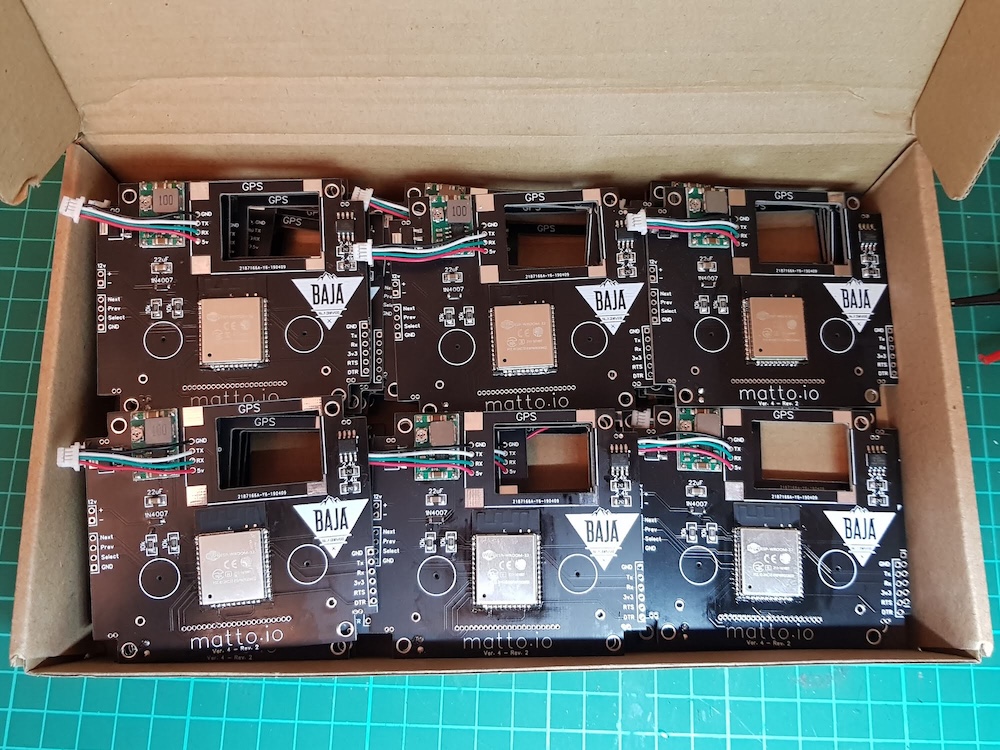 Boards with most components already soldered
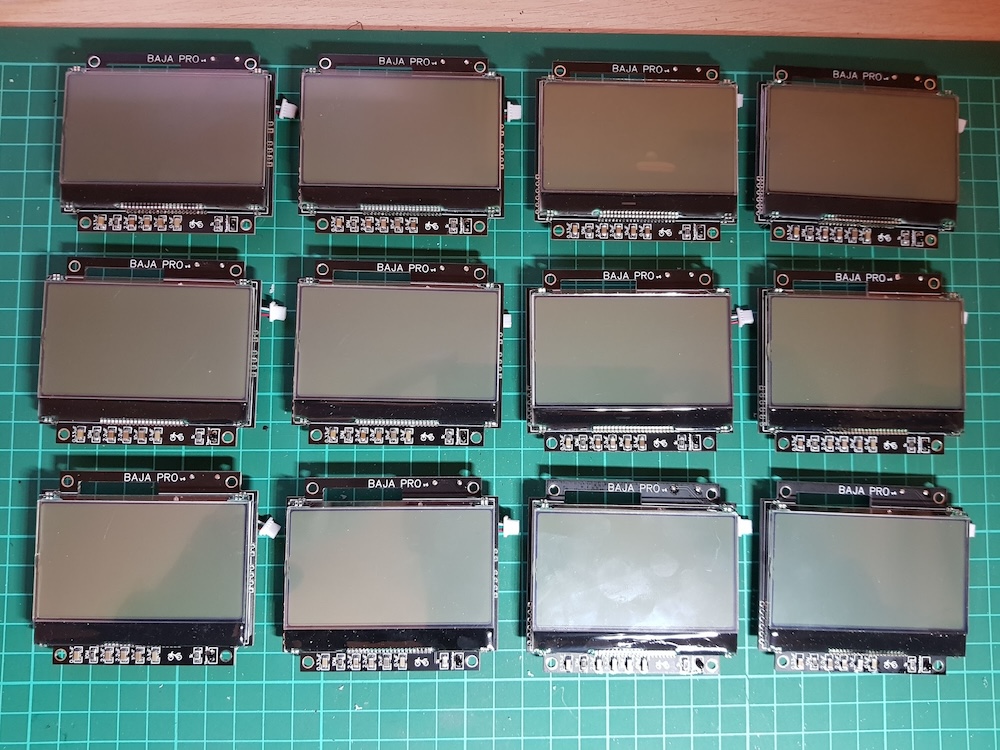 Soldered displays
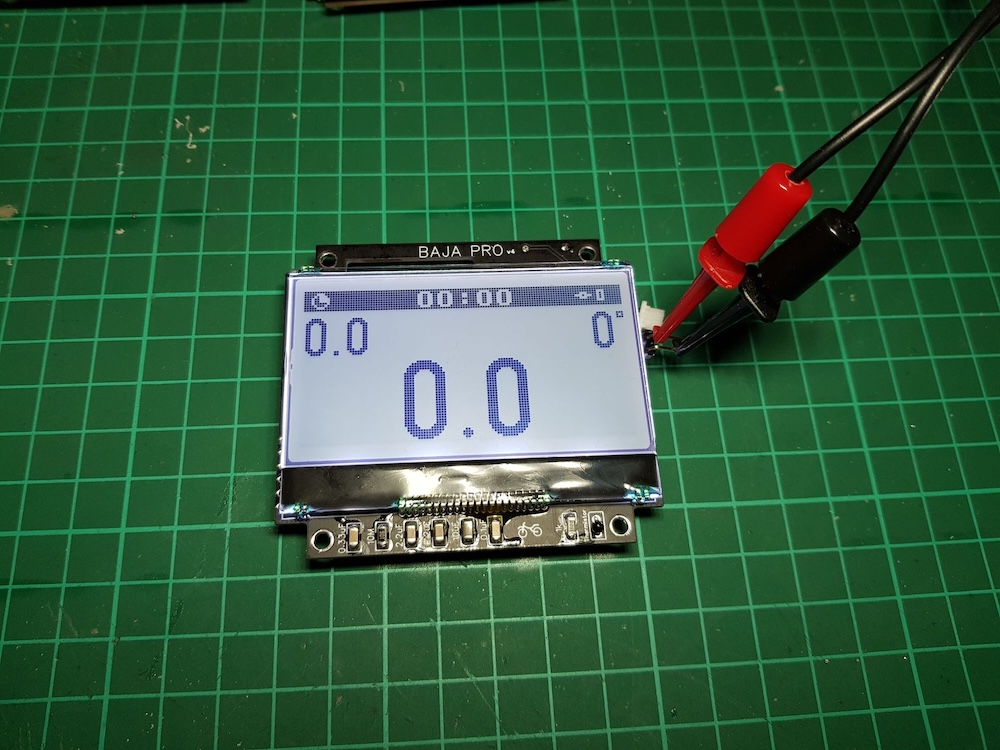 Testing a recently soldered display
 Quality test: Checking units one by one to confirm that they worked as expected
The moment of the sale
This was it. The moment had arrived. I had 25 units already assembled and tested.
I sent an email to all the people that had subscribed to the mailing list in the Baja Pro webpage to announce that I had 22 units for sale (I kept 3 units just in case some of them failed and I had to replace them).
I was not expecting the results: All units were sold in the first 9 hours after selling the email.
For the shipping I ordered custom cardboard boxes with the Baja Rally Computers logo.
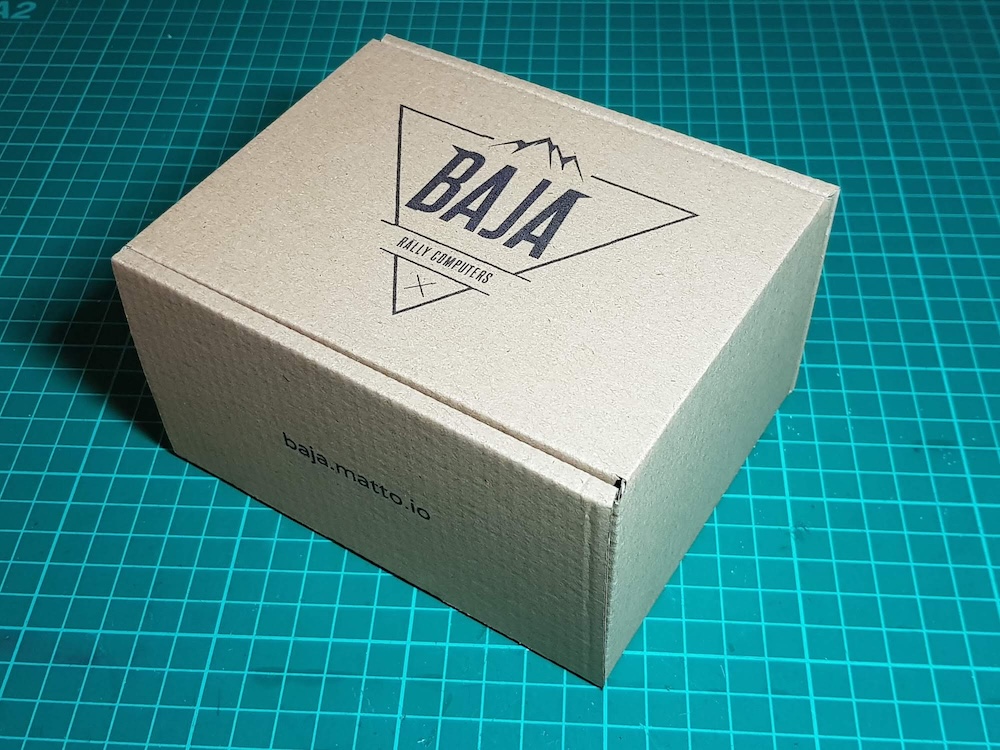 Baja Pro box
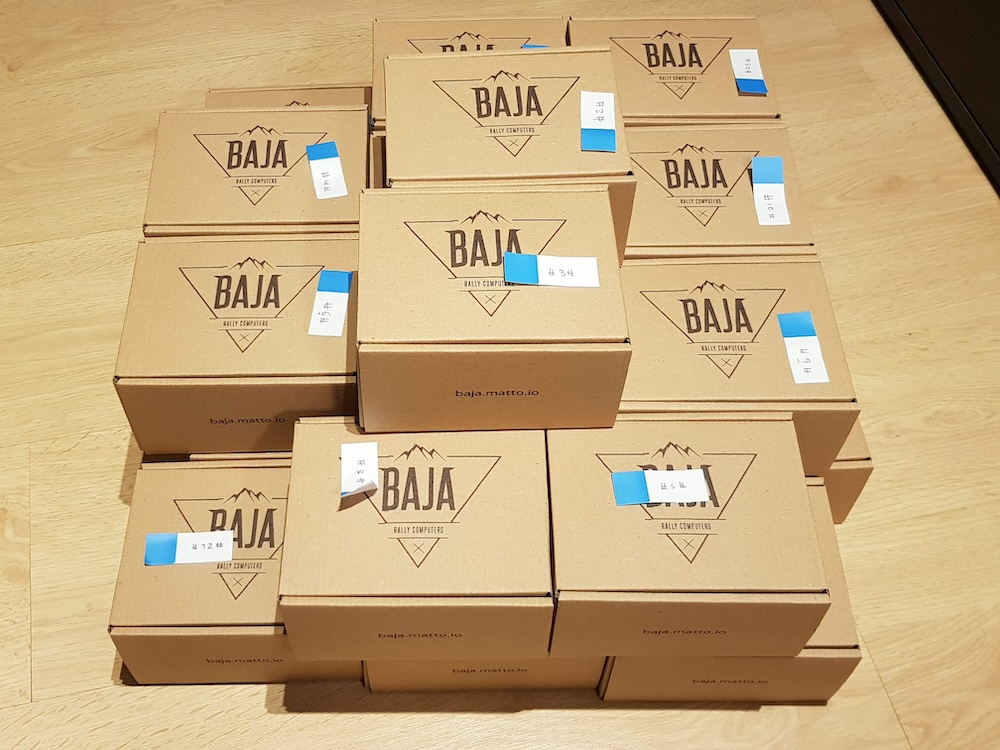 Orders ready to be shipped
Luckily, up until today (2 years after the sale) none of the units has failed, so I have not had the need to replace any of them.
The experience
Anyone would think that after a success like that I would immediately get back to work and build more units. Well… anyone that didn’t go through the whole process would think that.
The truth is that the process of making them was way more complex and tiring than I ever expected. I was a bit down at this point. So much so that I decided not to make any more units.
The reasons that led to this decision were a few.
Components
Finding a reliable source for electronic components is quite complex. Providers one day have stock, and the next day they don’t. On top of that, prices are very volatile and change constantly.
Most of those components are not built in Europe, so I had to import them, with the consequent customs taxes that this implies. This made the costs rise even more.
There is not only one provider that sells all of the components you need to build a Baja Pro, so you have to look for multiple providers, make multiple purchases, track multiple shippings and wait for all of them to arrive so you can continue.
Other components like the enclosures or the bolts and screws were possible to be sourced directly in Europe, but interestingly the enclosures provider (Retex) was the one that I had the most problems with. It seems that a small order like mine was not important enough, so I had to push them every day to ship it, even when I had already paid for it.
Time and complexity
To make a single unit from scratch implies a lot of steps:
- Cut the windows in the enclosures
- Cut and engrave the screen protector
- Cut the two sided tape for the screen protector
- Flash the firmware to the microcontroller
- Solder all of the electronic components
- Cut and solder the cables
- Install the support screws on the back of the enclosure
- Install and solder the buttons in the remote
- Cut and solder the cables for the remote
- Run some tests to check that everything works as expected
just to mention the main ones.
This process takes a LONG time. Time that I could only afford to spend on the afternoons after finishing my Monday-to-Friday job.
At some point I was really tired. I started this project because I enjoy these things a lot, and I was afraid to start hating it. It was exactly what was starting to happen.
If I invested the same time into other activities (say, software development) y could earn much more money than making Baja Pros, so it did not fit as a business for me either.
Taxation
Sadly Spain is a horrible place to start a small business.
In order to do it you have to register as a self-employed worker, which means paying more that 200€ per month, even if you did not sell anything that month.
Not to speak of the outrageous prices and bureaucracy implied in registering a company.
It’s like the did this on purpose just to discourage new enterpreneurs.
Given that this project did not have a lot of profit, the number didn’t add up. I would not be able to pay all of the taxes demanded by the state.
Price
My initial idea was to achieve an affordable tripmaster so new pilots that were starting in the world of roadbook navigation were able to get one.
I greatly underestimated the costs of the materials, the taxes and the time that this project would take.
Even though the sale price for the Baja Pro was quite lower than a regular ICO (especially taking into account the number of features the Baja Pro has), it still was more expensive than I’d like it to be.
I had not achieved my main objective.
Learning
The truth is that along this process I’v learnt countless new skills, and that’s the biggest reward I got from this project.
It was an excuse for me to study and implement a bunch of stuff that I wanted to learn for a long time. It was a really good way to concentrate it all in a single project that also collided with other favourite hobby of mine: motorcycles.
I always liked solving problems, learning new stuff and face new challenges. The Baja Pro gave me all that and a lot more.
Going to a rally and seeing pilots that have a Baja Pro installed in their motorcycles and knowing that they are happy with it is a great experience that’s hard to explain with words.
Releasing the code
After much thinking I’ve decided to make this an open source project.
I’ve always been a big advocate of open source, and I felt a bit like a hypocrite for keeping the Baja Pro source code closed. The project has been stalled for a couple of years now and I would not like for it to be forgotten.
On the other hand, I am very curious to know what improvements and features will be added by the the community, which I hope keeps growing for a lot more years.
I honestly think that this is something that could benefit those new pilots, or even professional pilots that miss some of the functionalities that the current and outdated tripmasters don’t offer.
Presenting Open Rally Computer
My company “Baja Rally Computers” will continue to exist just in case I come up with some new crazy idea.
That’s why I decided to change the name of the project. From now on it will be known as Open Rally Computer. It’s a more fitting name for what will be an open source tripmaster that anyone can make.
I have not only released the source code. I also released the bill of materials, wiring diagrams, PCB designs and instructions manual.
You can find all of this in the GitHub repository which is now the new home for the Open Rally Computer project:
https://github.com/mattogodoy/open-rally-computer
With a bit of luck this initiative will gain some traction and we’ll be able to build a community of developers that add new features and ideas.
License
Something very important to take into account when creating an open source project is the license.
In this case I chose GPL v3.
⚠️ This means that the source code of Open Rally Computer can be copied, modified, distributed and even commercialized, but with a very important condition: any project that uses this code (partially or totally) will also have to open source all of their code. Failing to do so would expose them to legal actions.
That is what I like the most about this license. It’s like a computer virus. A good virus that spreads other projects turning them into open source too.
Conclusion
Developing the Baja Pro has been a rough and long way, but has left me with countless valuable skills and an experience that I hope to apply to future adventures.
I cannot wait to see the future of this project. I hope the open source community helps me to achieve what I could’t by myself; an open source affordable tripmaster that is very reliable. Maybe the one that will in the future be the choice of professional Dakar pilots. Dreaming doesn’t cost a thing.